Save frames in a base
Adding a record to a table (in a MINTDATA base) allows you to save the frame data permanently. The data is then available for collaborative reading and modification by end-users in your organization.

Create a base
You can create a base using the BASE_ADD() function.
To create a base, pass a unique base-name in the function.
Create a table
You can create a table in a base by using the TABLE_SPEC() function.
Before creating a table, you might need to list all the tables currently available in a base. To do so, use TABLES() function, like in the example below:
The following example illustrates how to create a table:
In an empty cell, enter the name of the base where you want to create a table.
In an empty cell, enter a name for the table.
Enter a table definition using one of the following ways:
- Enter a definition directly in a two-column range of cells. In the first column, specify the table column names. In the respective cells in the second column, specify a data type. The following shows an example a table definition with column names "name" and an associated data type string, and "age" of type "number".
A B C 1 name string 2 age number 3 - Use a frame literal in the TABLE_SPEC() function. An equivalent frame literal for the table definition above is {"name","string";"age", "number"}. You can either pass the frame literal directly in the function or create a frame by entering '={"name","string";"age", "number"}' in an empty cell, and then reference the cell in the TABLE_SPEC function.
- Enter a definition directly in a two-column range of cells. In the first column, specify the table column names. In the respective cells in the second column, specify a data type. The following shows an example a table definition with column names "name" and an associated data type string, and "age" of type "number".
In an empty cell, enter a formula that contains the TABLE_SPEC() function, like in the example below:
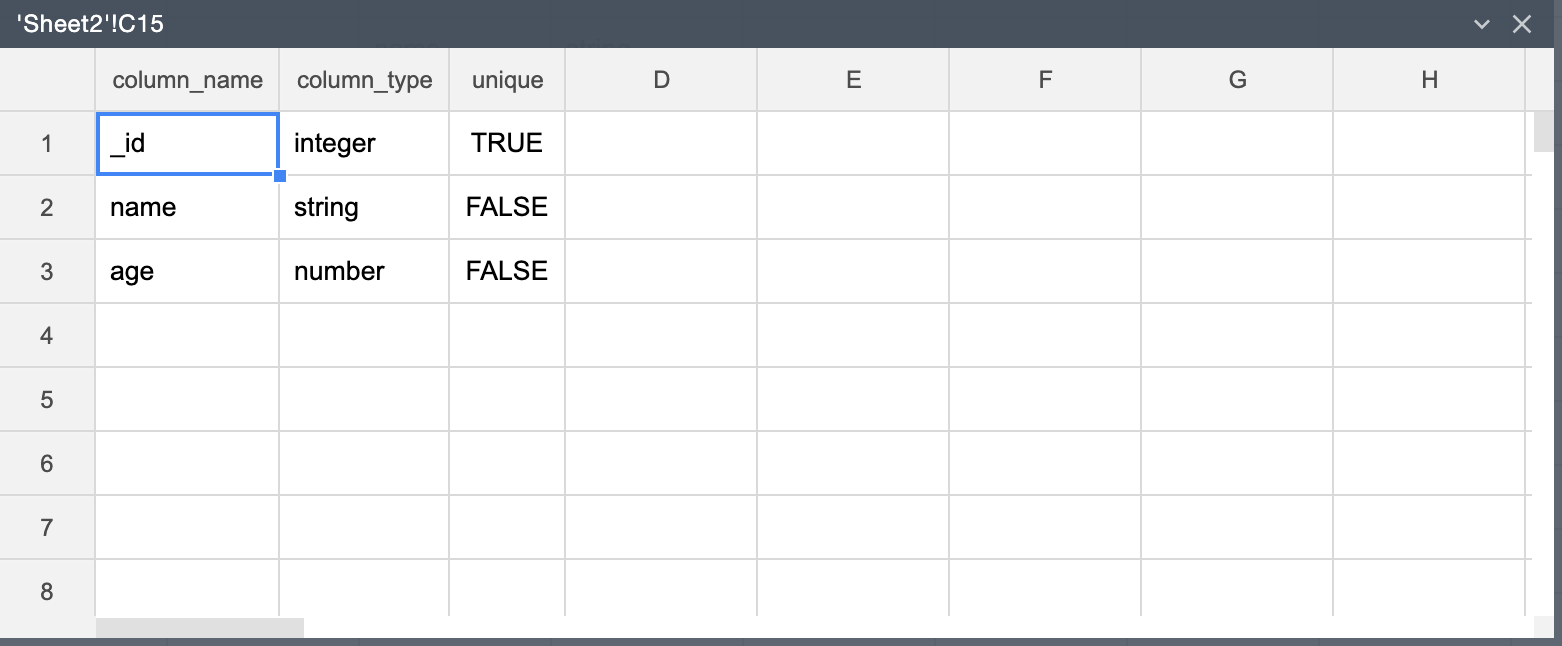
=TABLE_SPEC("base_name","table_name",A1:B2)As a result, the function returns a frame like this:

Note that when you apply the TABLE_SPEC function, an auto-generated unique ID column with 'integer' type is created by default.
Add records to a table
You can add records to a table by using the ADD_RECORDS() function.
To add records to a table:
Specify data for the record by populating two rows in the spreadsheet. The first row must contain the base-table columns, and the second row must contain the respective values. The following shows an example of record data:
A B C 1 name age 2 bob 42 3 In an empty cell, enter a formula using the TABLE_ADD_ROWS function. As the arguments, use the base name, table name, and FRAME({data-range}). The following is an example of using the TABLE_ADD_ROWS function.
=ADD_RECORDS("base_name","table_name",FRAME(A1:B2))If the operation is successful, TRUE is displayed in the cell, which means that a new record is added to the table "table_name" in the base "base_name".
Find records in a table
You can view records that a table contains by using the GET_RECORDS().
To view all records in a table, use the following formula:
To view specific records filtered by a condition:
In a range of cells, specify a condition, like in the example below:
A B C 1 @age > 25 2 @name ilike bob 3 offset 1 4 count 2 5 Use the address of the range above as the third argument.
=GET_RECORDS("base_name","table_name",A1:C4)
Remove a base permanently
Once a base is no longer needed, you can delete it by using the BASE_DELETE() function.
The following illustrates the formula to delete a base:
To delete a base, pass the name of the base that you want to delete to the BASE_DELETE function.
Remove a table
You can delete a table from the base by using the TABLE_DELETE() function.
To delete a table, pass to the function the name of the base as the first argument, and, as the second argument, pass the name of the table to delete.
The following shows an example of a formula that deletes the table "table_name" from the base "base_name":