'/%3E%3Cdefs%3E%3ClinearGradient id='paint0_linear' x1='0' y1='0' x2='0' y2='2160' gradientUnits='userSpaceOnUse'%3E%3Cstop/%3E%3Cstop offset='.1' stop-color='%23000' stop-opacity='0'/%3E%3Cstop offset='1' stop-opacity='0'/%3E%3C/linearGradient%3E%3C/defs%3E%3C/svg%3E%0A)
End-user login with Google
- You don't have to securely manage passwords.
- You don't need to implement authentication or protection against malicious login attacks.
- Your users don't have to remember an extra username and password.
By using a third-party login for your end-users, the third-party takes care of all that responsibility. Your app waits for the end-user to go through authentication. Then the third-party sends your application the information about that end-user.
This section describes how to set up end-user login with Google.
Before you start, make sure you've got a Google Account.

Register your application as a client to Google
Configure the consent screen
Open a browser and go to https://console.developers.google.com.
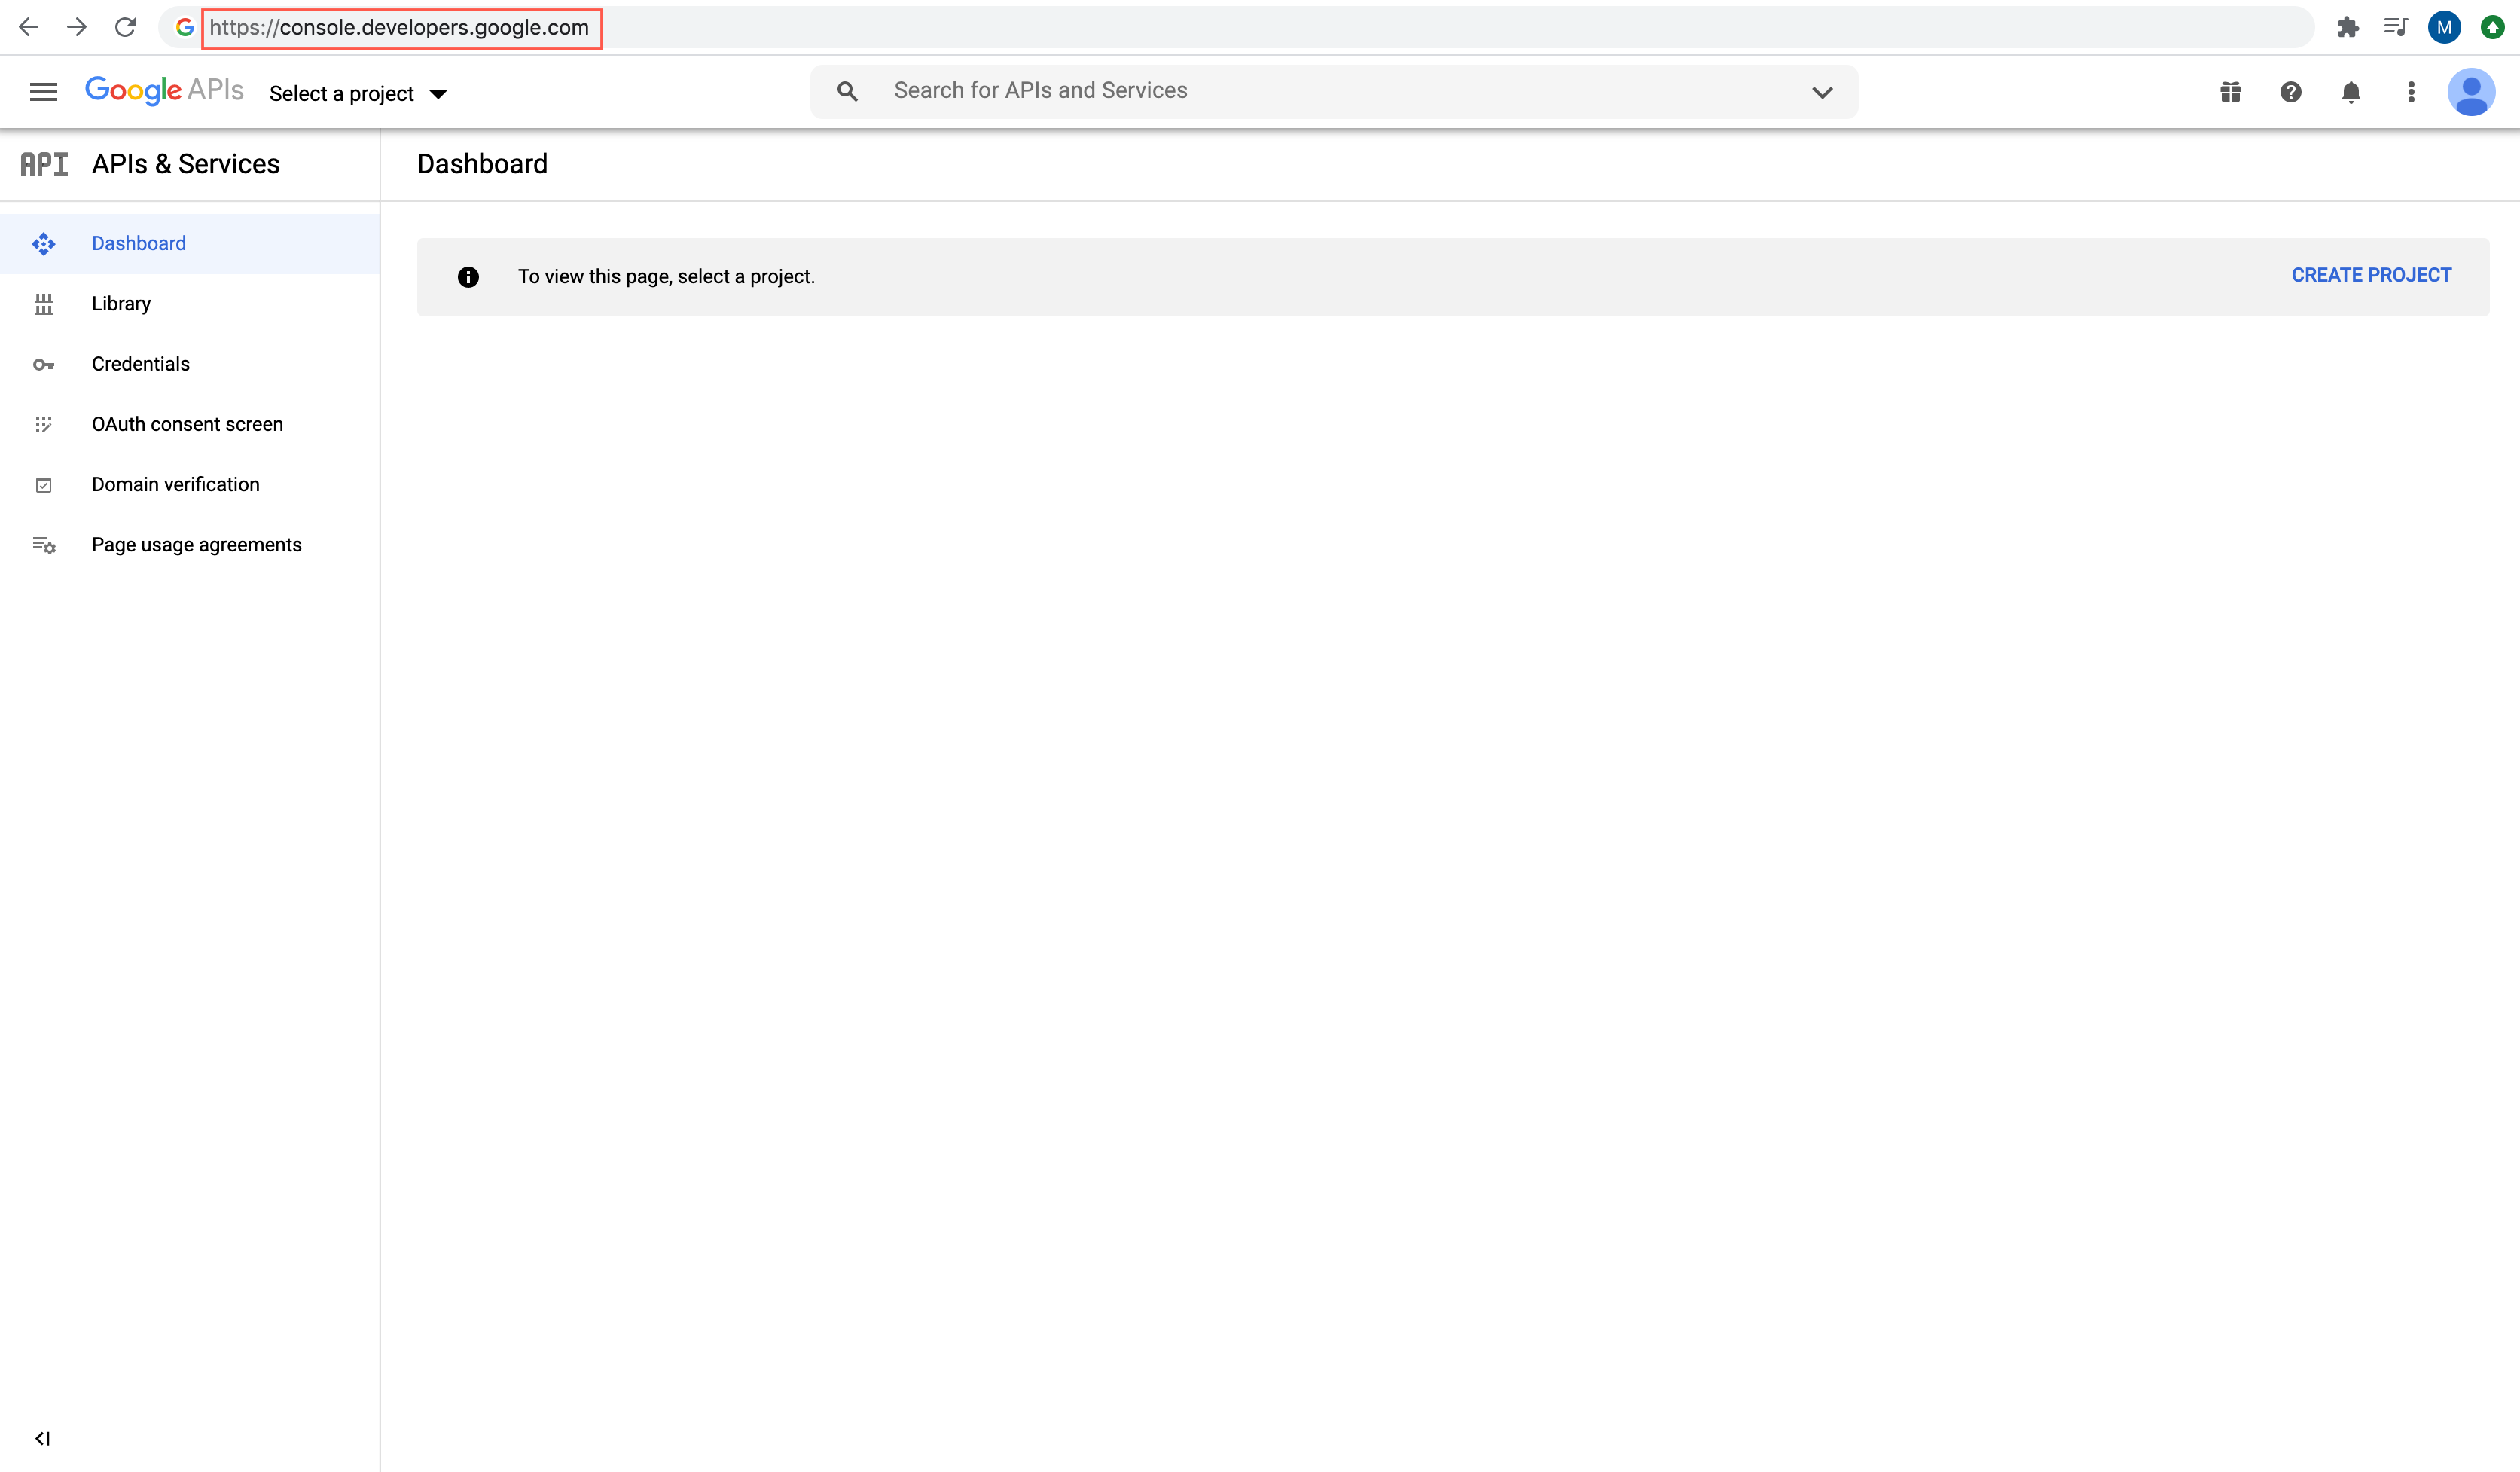
Select or create a project.
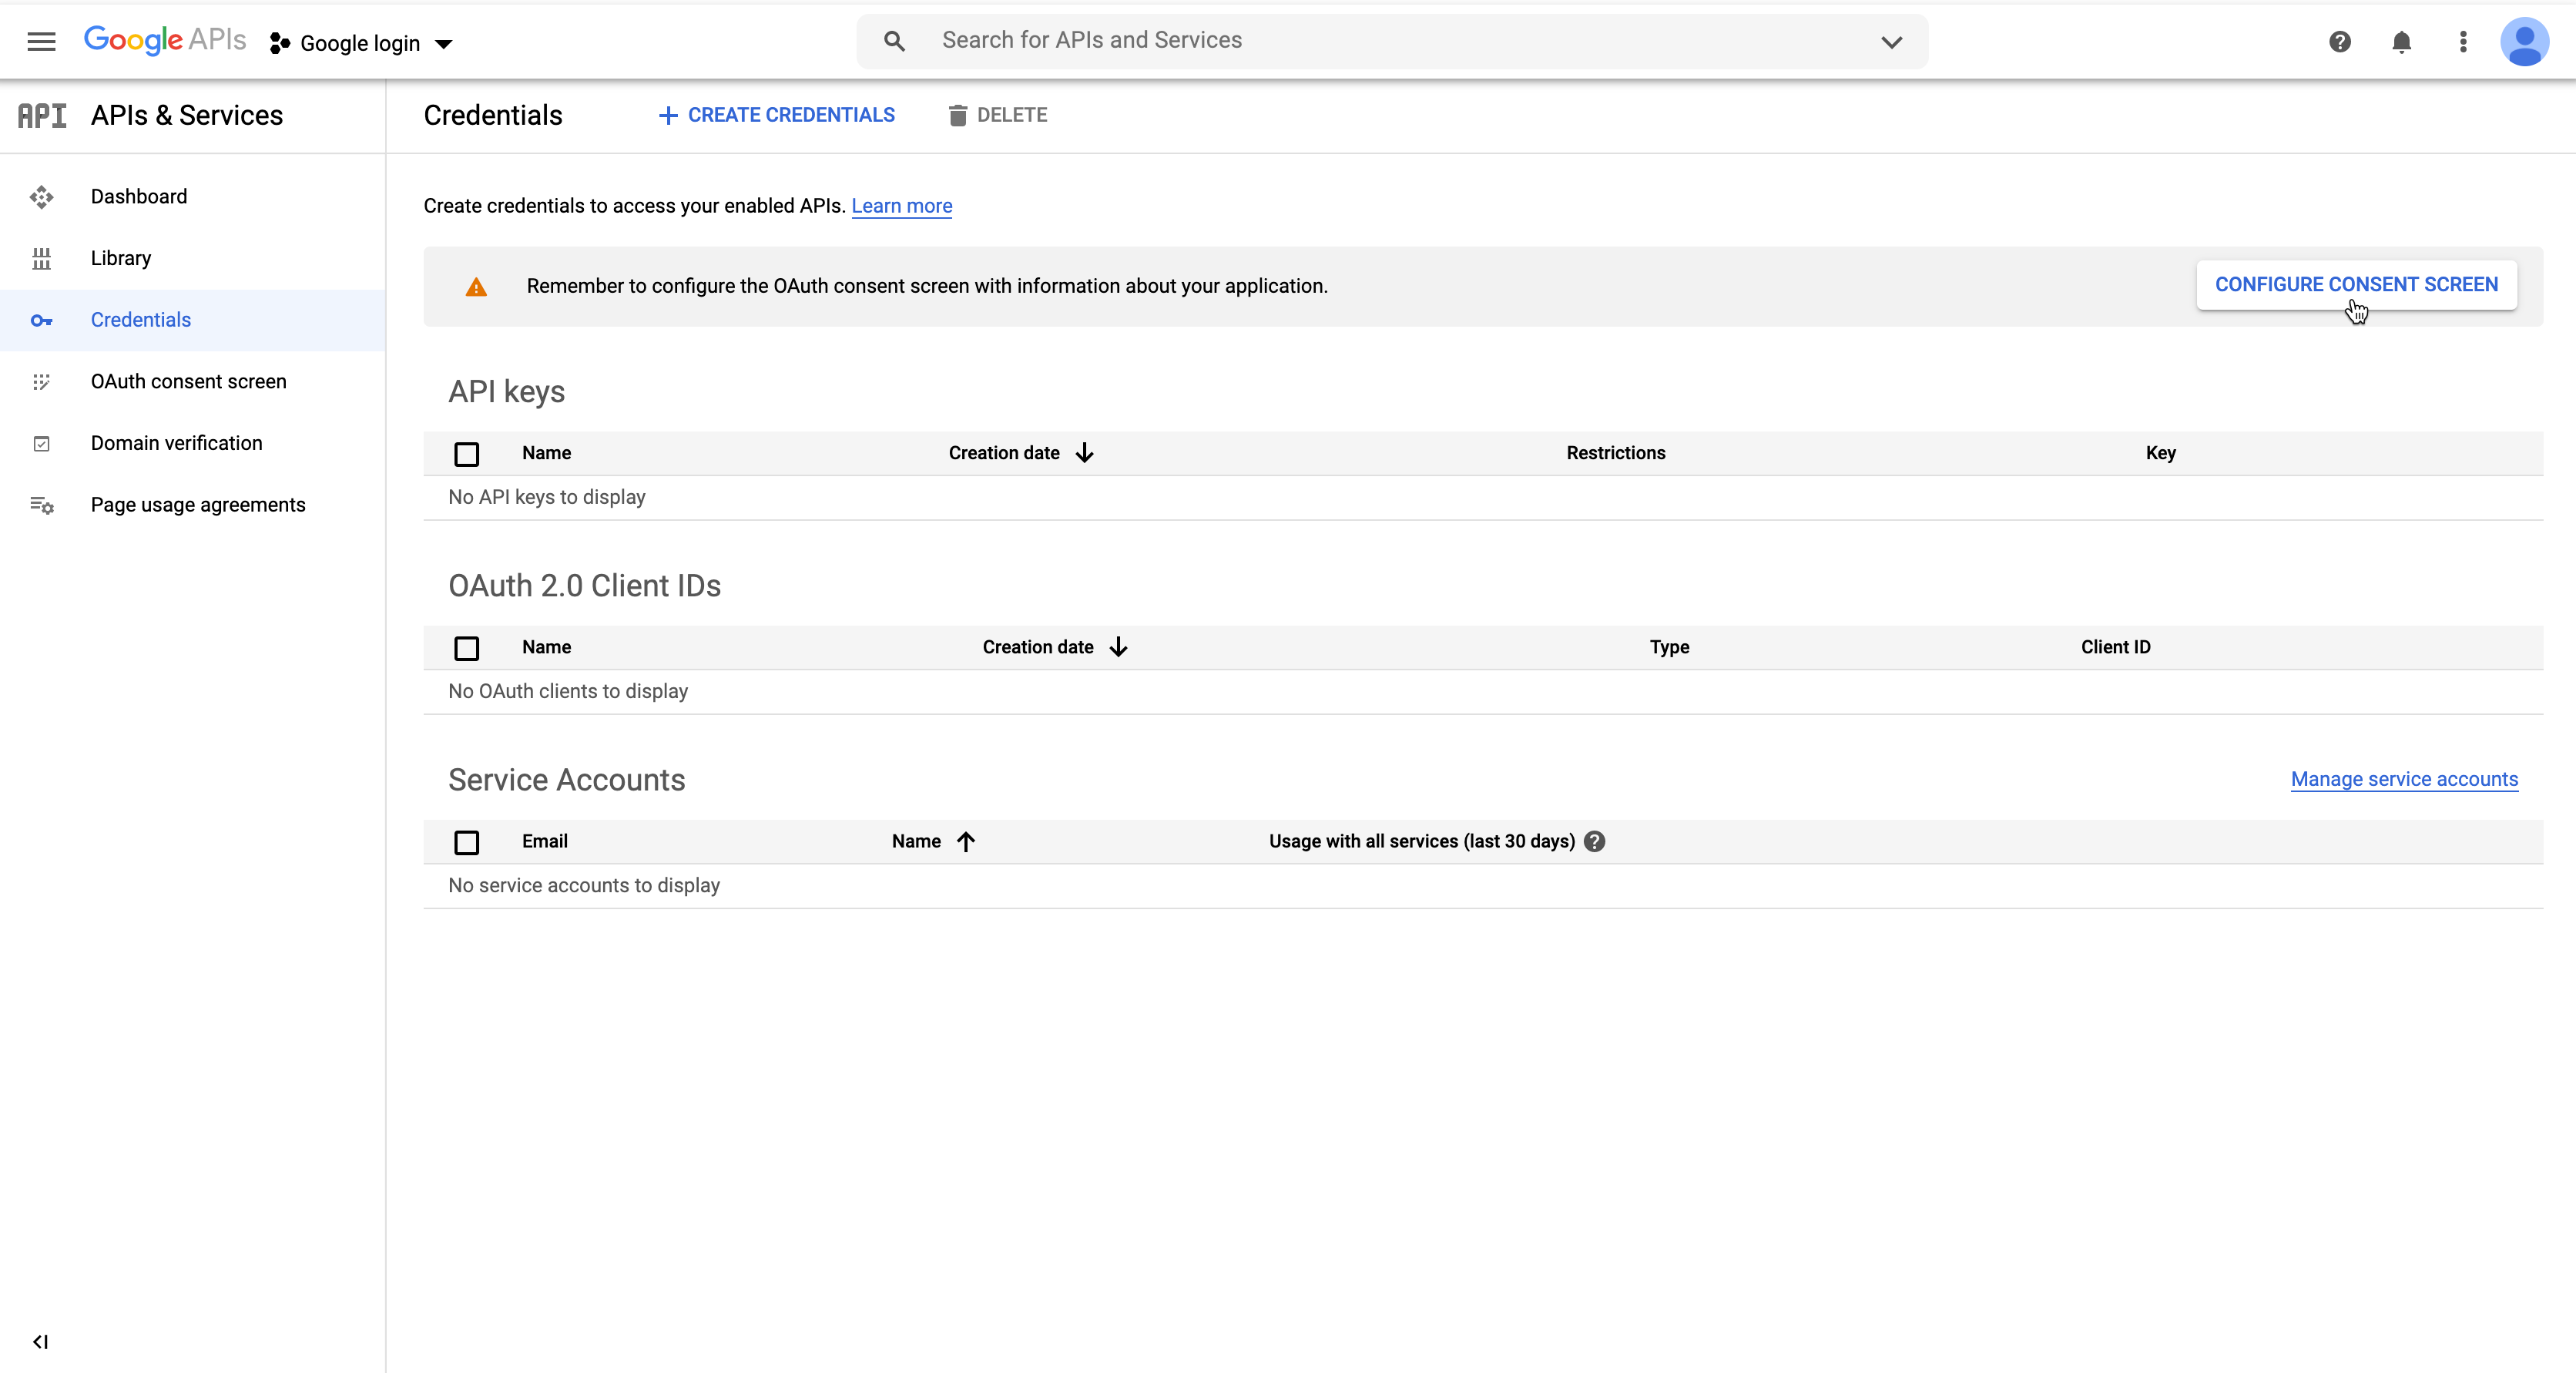
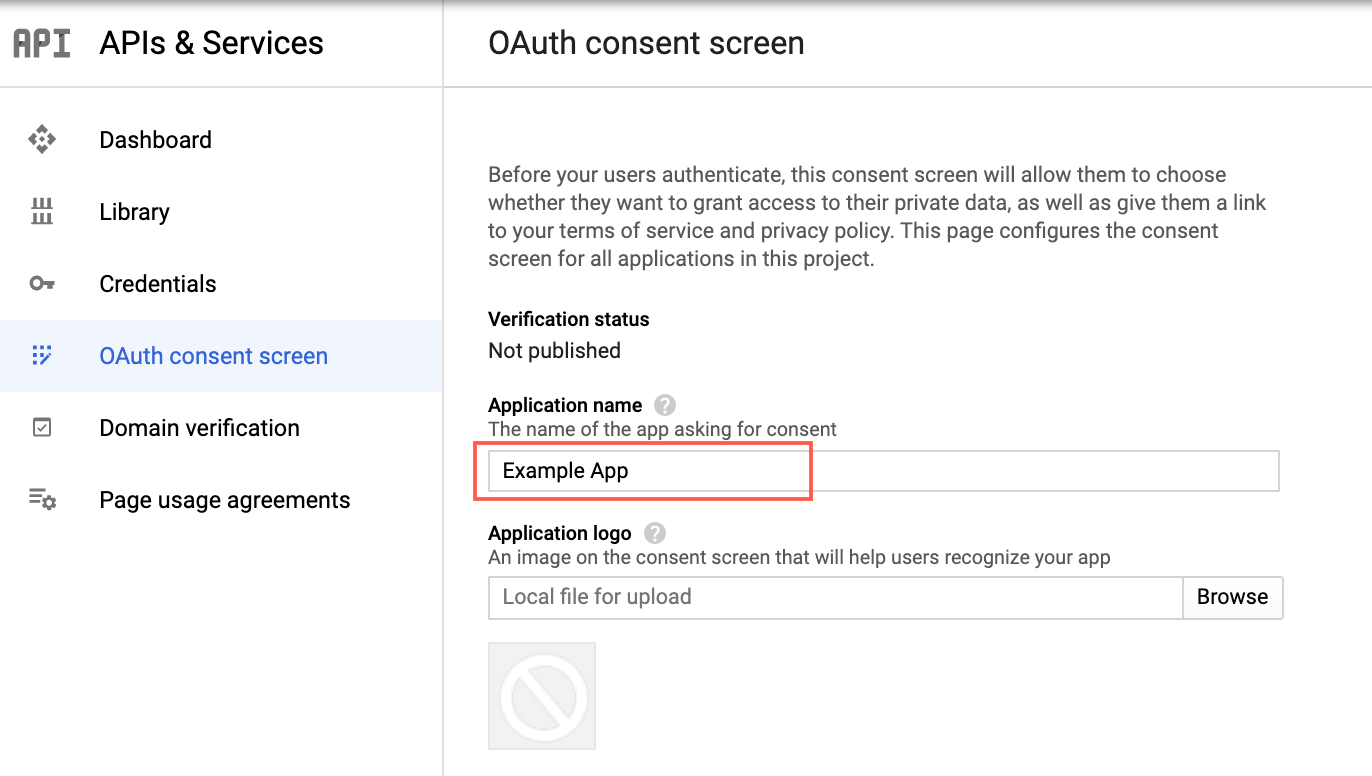
On the left, select Credentials, and then click Configure Consent Screen.
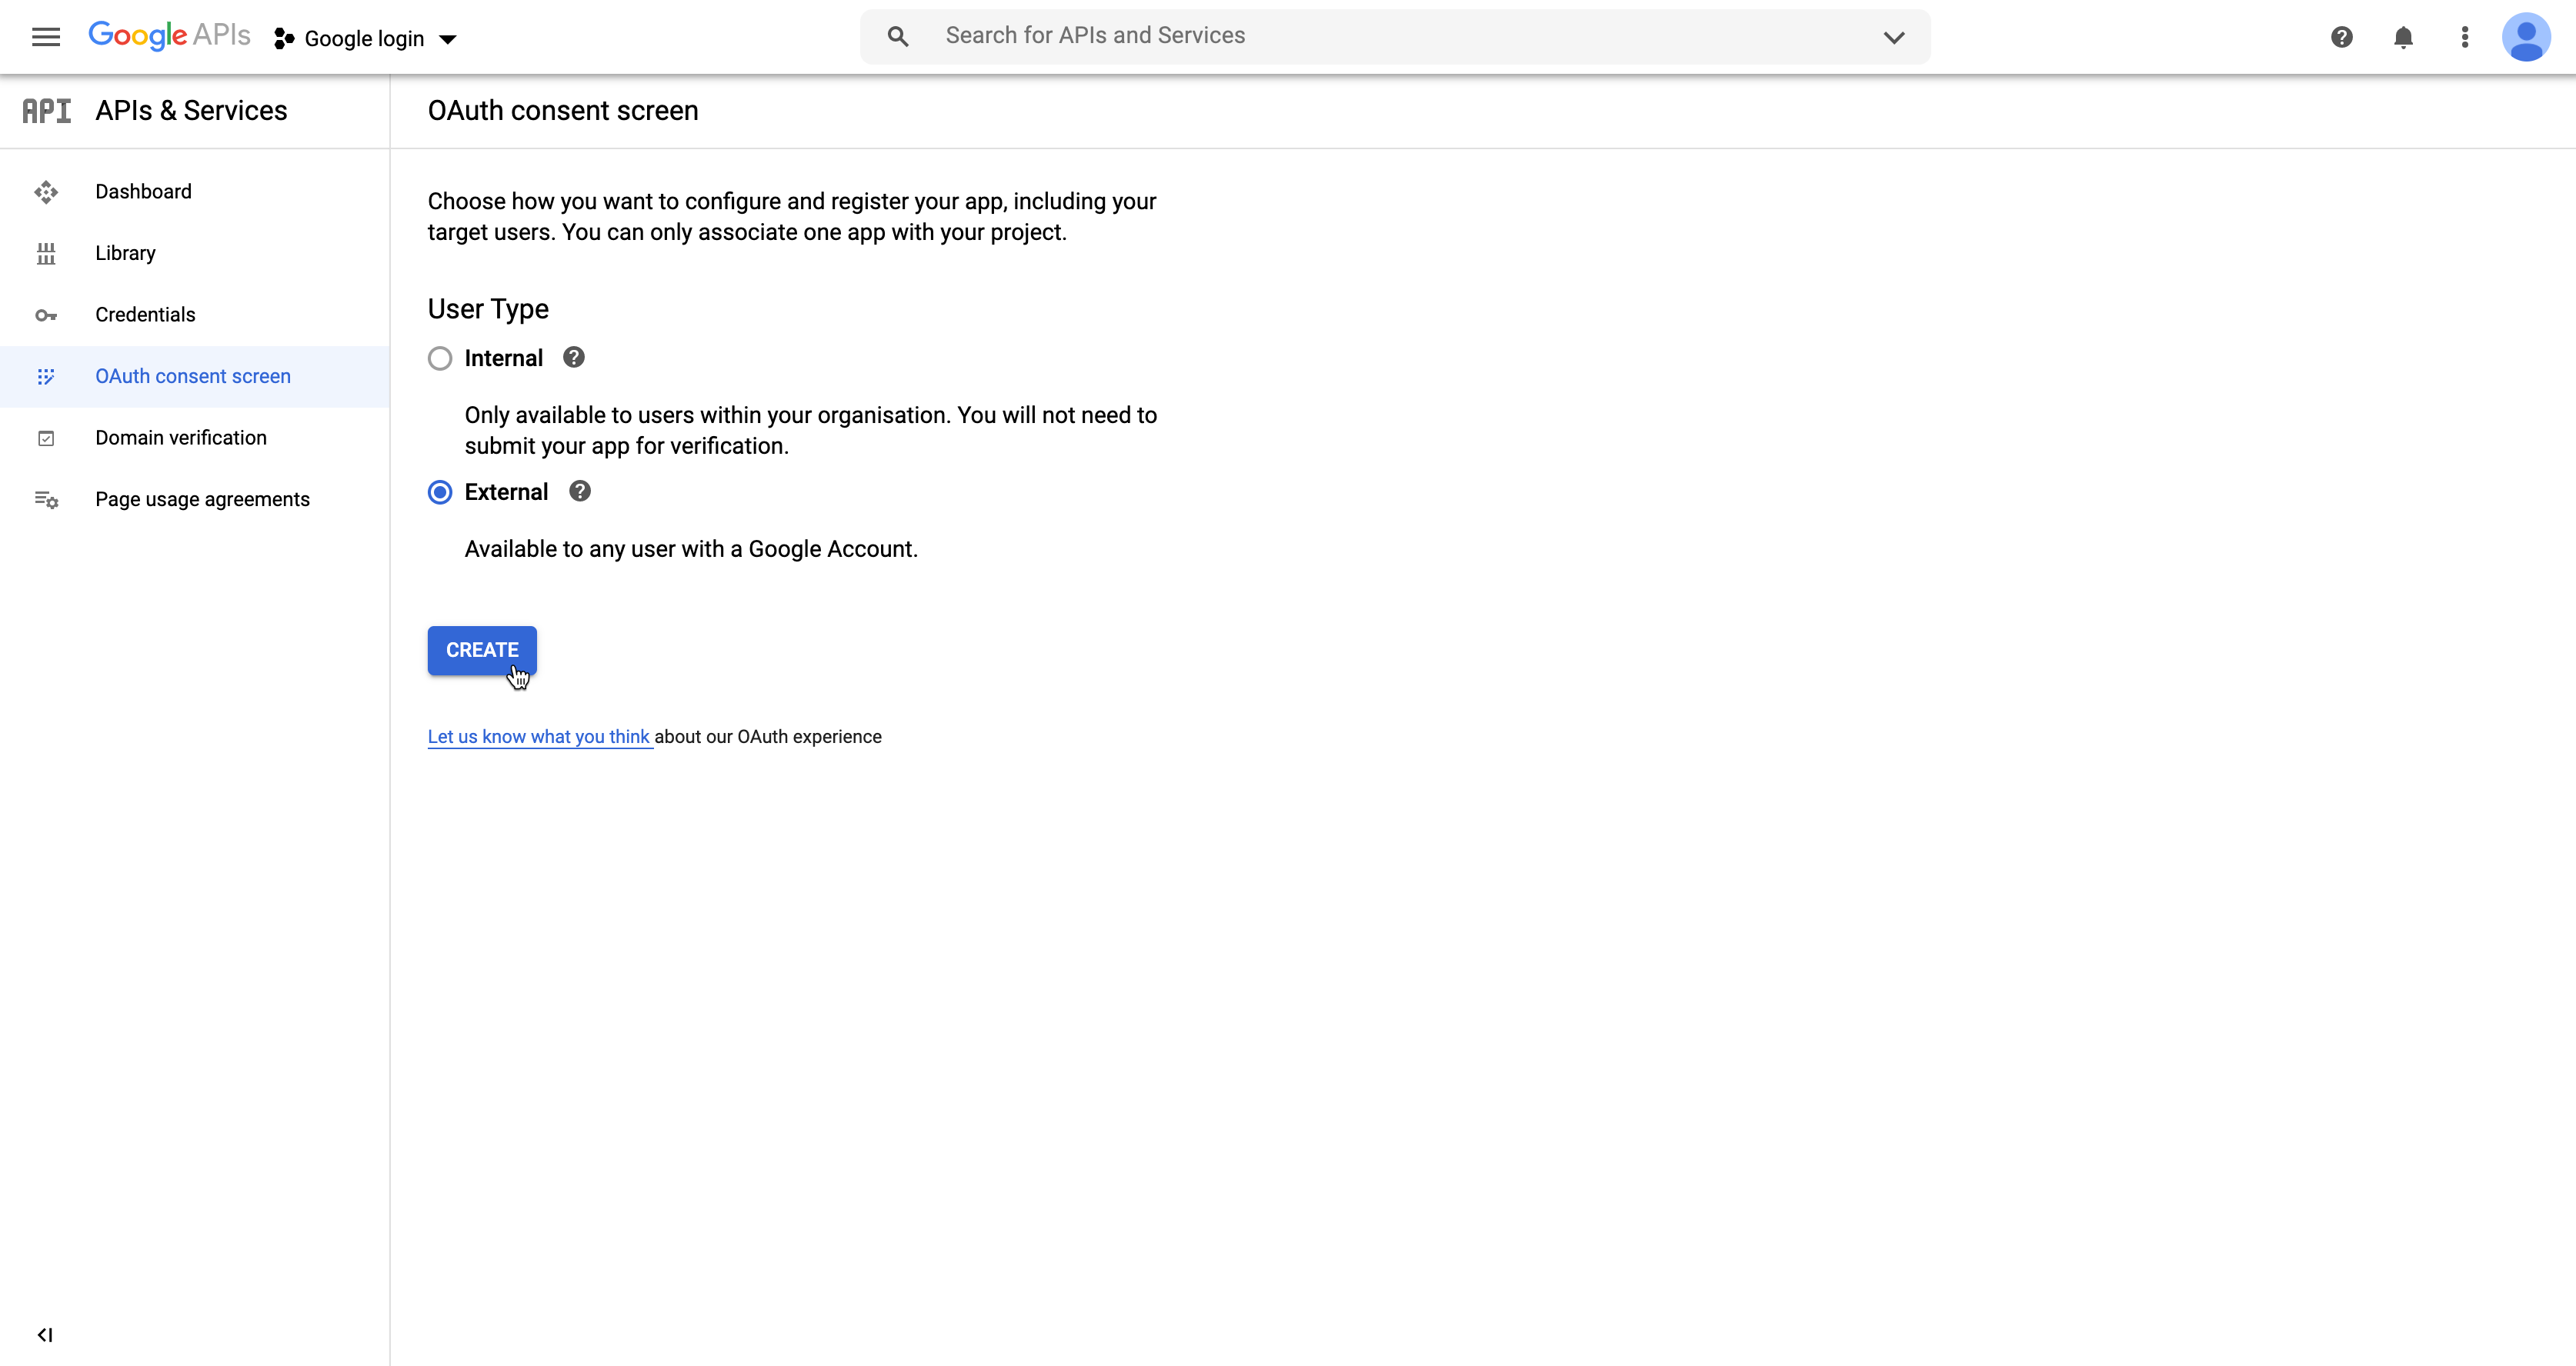
For the User Type select External. Click Create.
Fill out the Application name field, and then click Save at the bottom.
Create client credentials
On the left, select Credentials, and then click Create Credentials > OAuth Client ID.
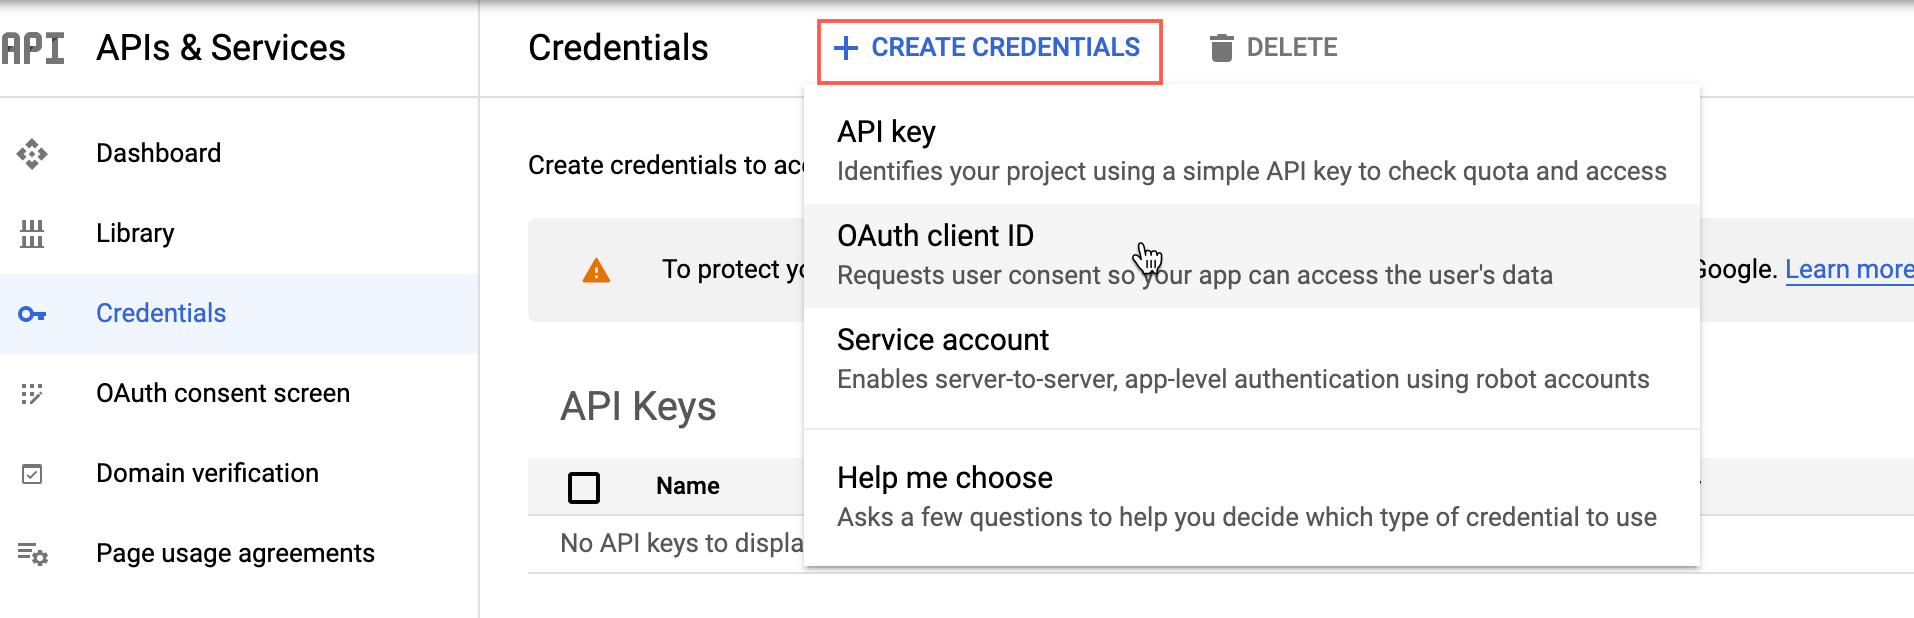
The Create OAuth client ID dialog appears.
In the Application type field, select Web application. The fields for a client of type Web application appear.
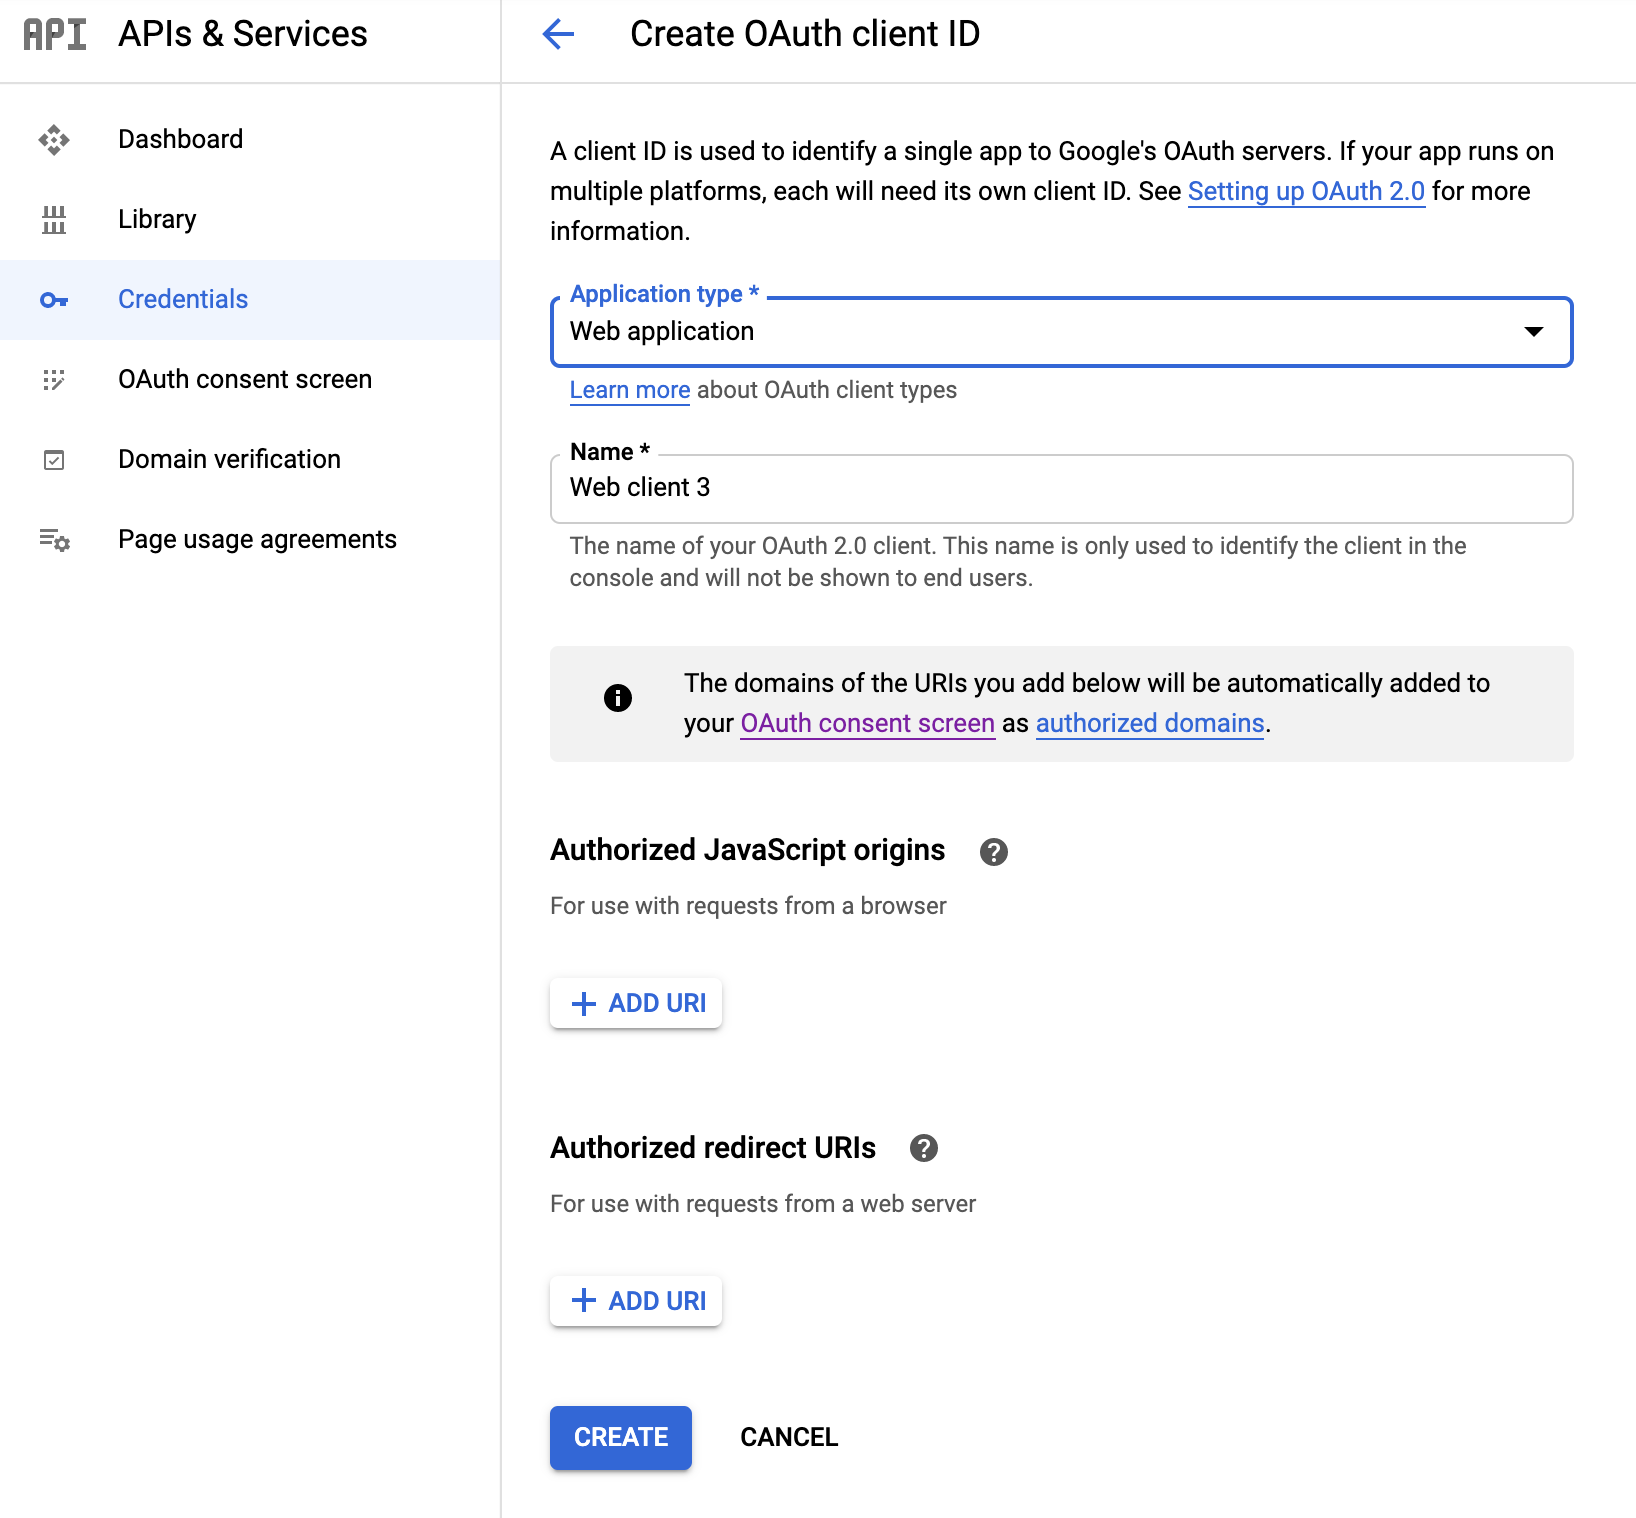
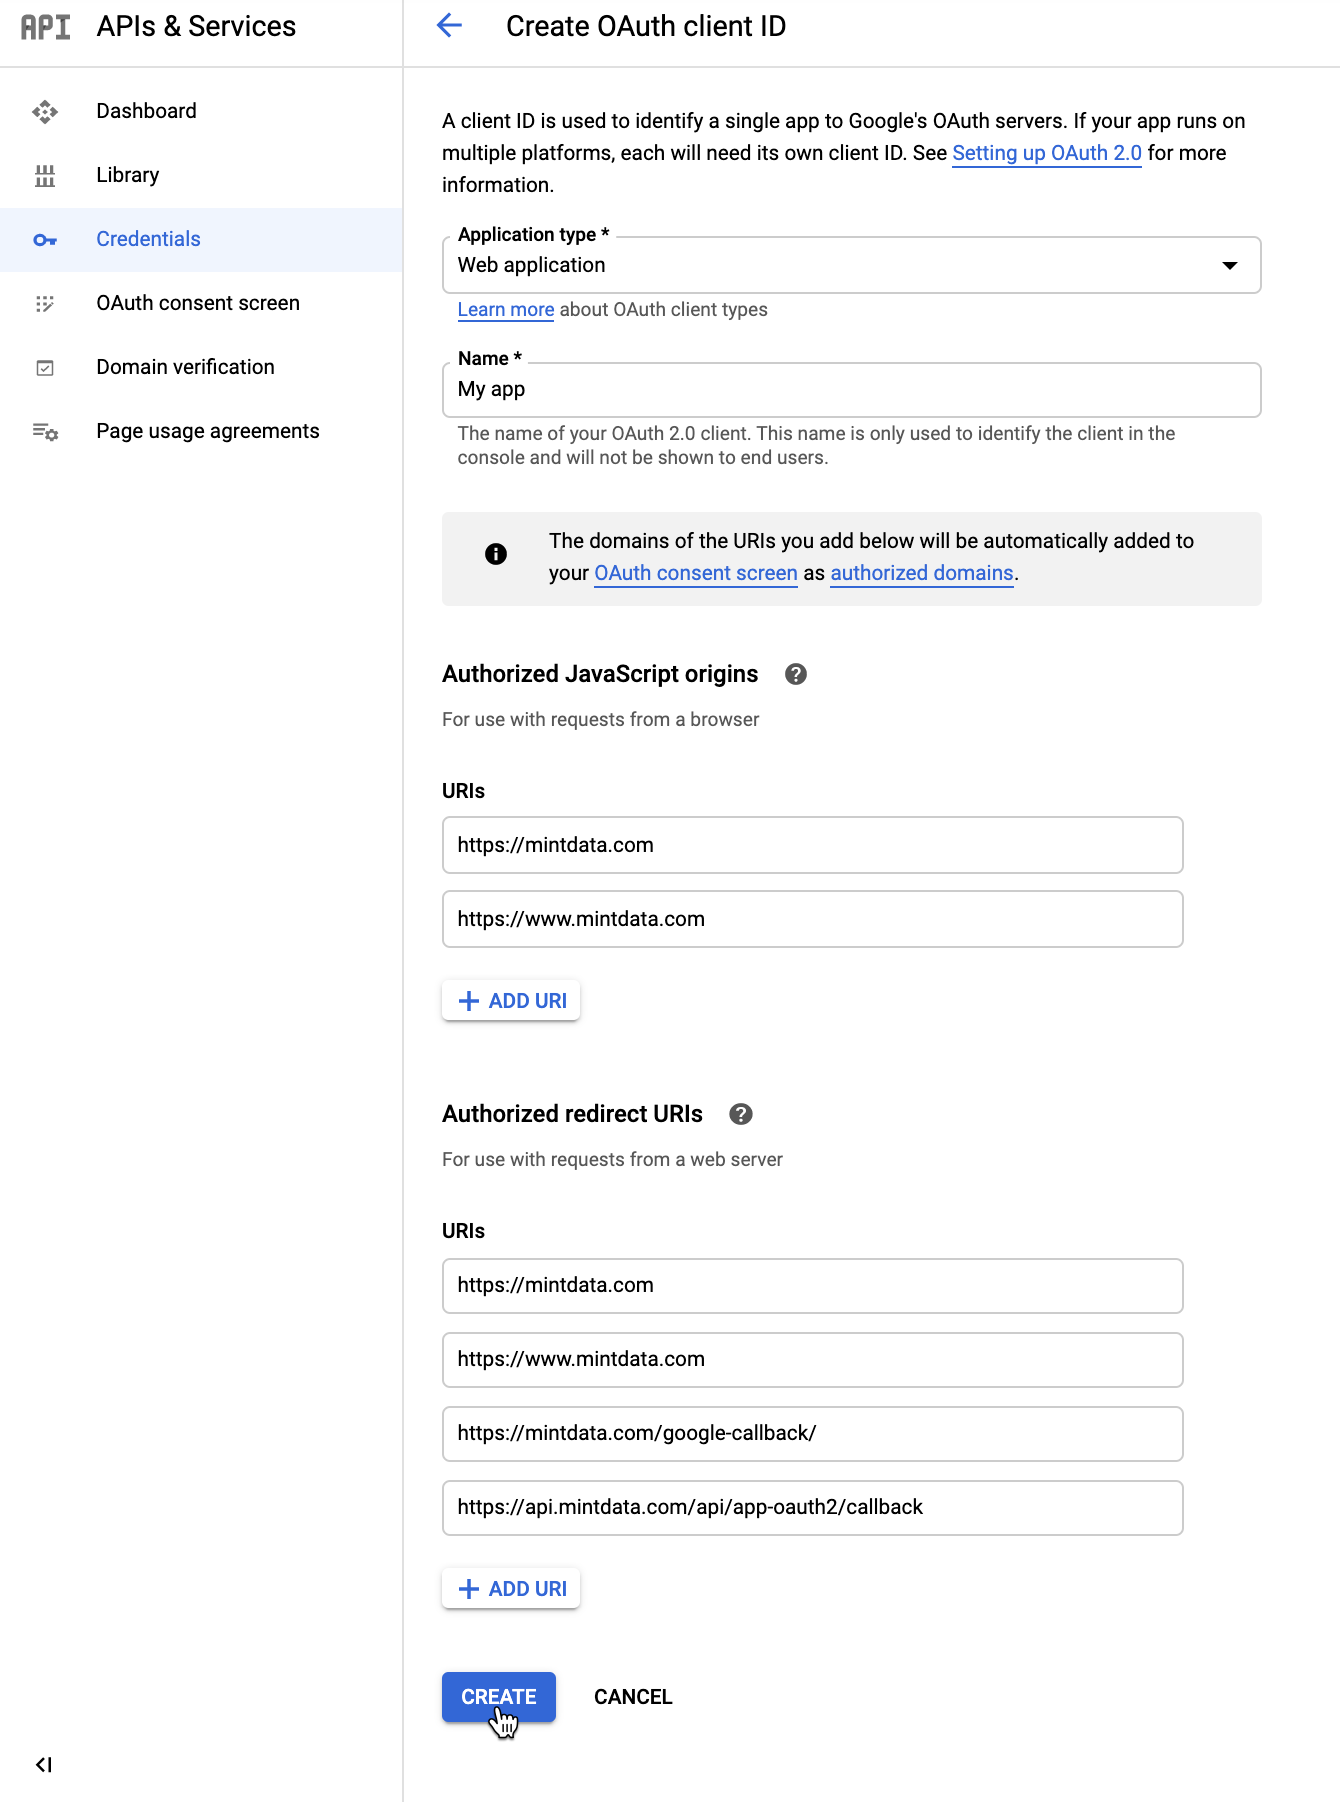
Complete the Web application form as follows:
- Under Name, leave the default value or type any name to help you identify the credentials in the Google console.
Under Authorized JavaScript origins, add the following URIs (might be different for the actual users):
- https://mintdata.com
- https://www.mintdata.com
Under Authorized redirect URIs, add the following URIs (might be different for the actual users):
- https://mintdata.com
- https://www.mintdata.com
- https://mintdata.com/google-callback/
- https://api.mintdata.com/api/app-oauth2/callback
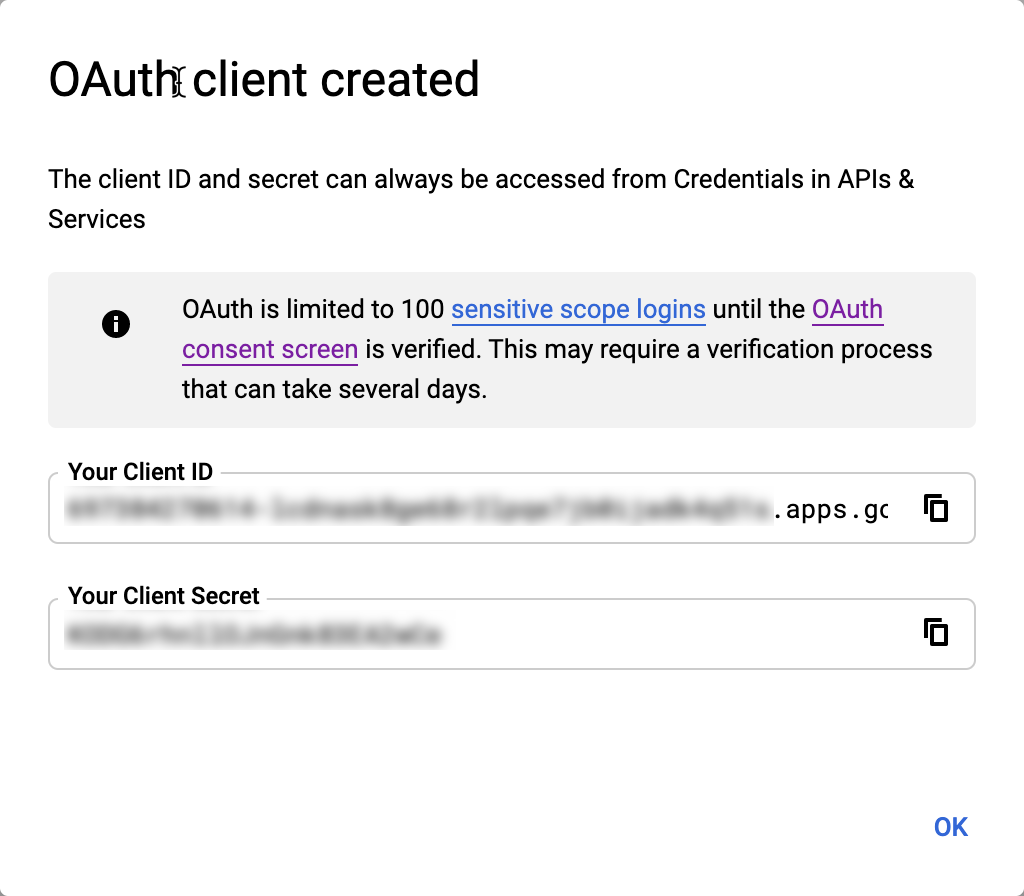
Click Create.
The OAuth client created pop-up appears. Take note of the generated client ID and client secret.
Set up authentication on MINTDATA™
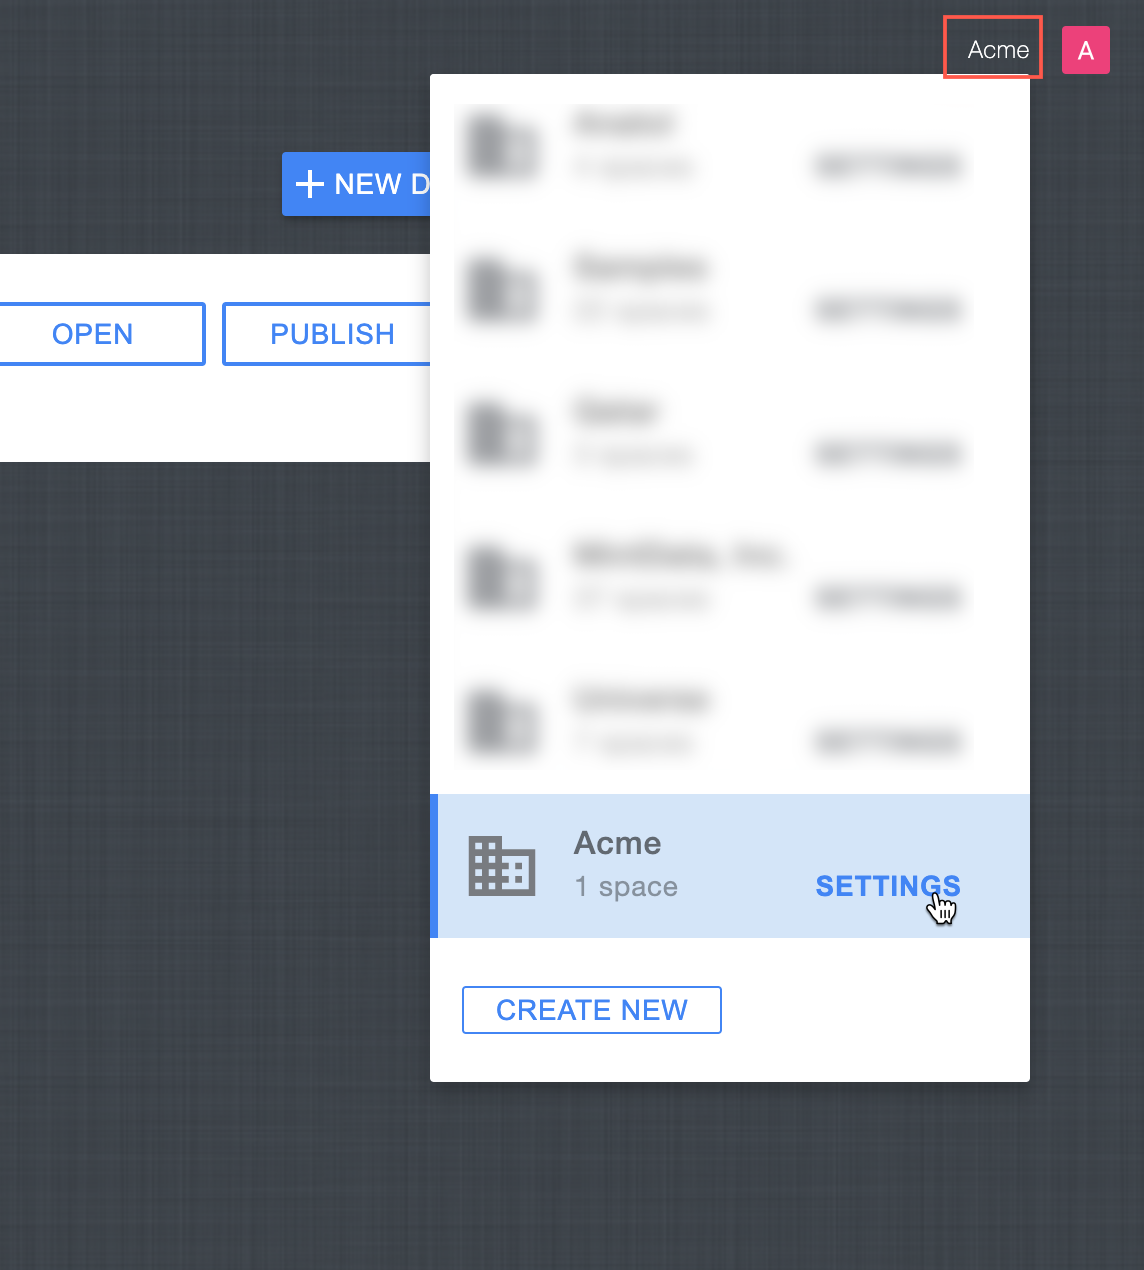
In your organization's workspace on MintData, click on the workspace name in the top right corner, and then click on Settings.
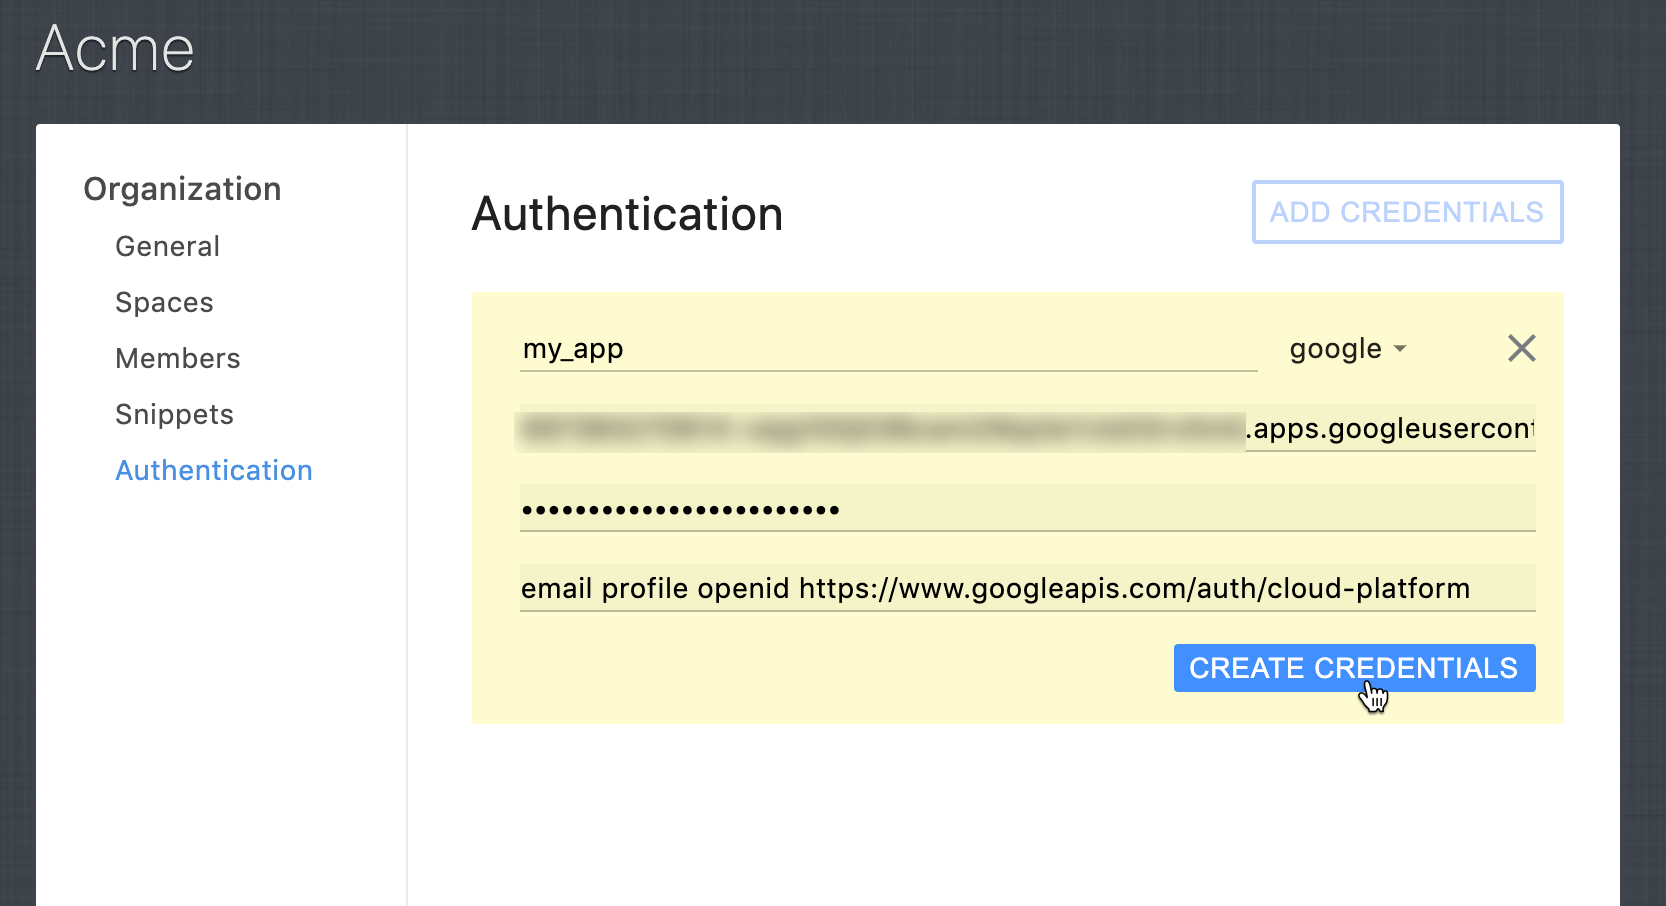
Click Authentication > Add Credentials. The Authentication dialog box appears.
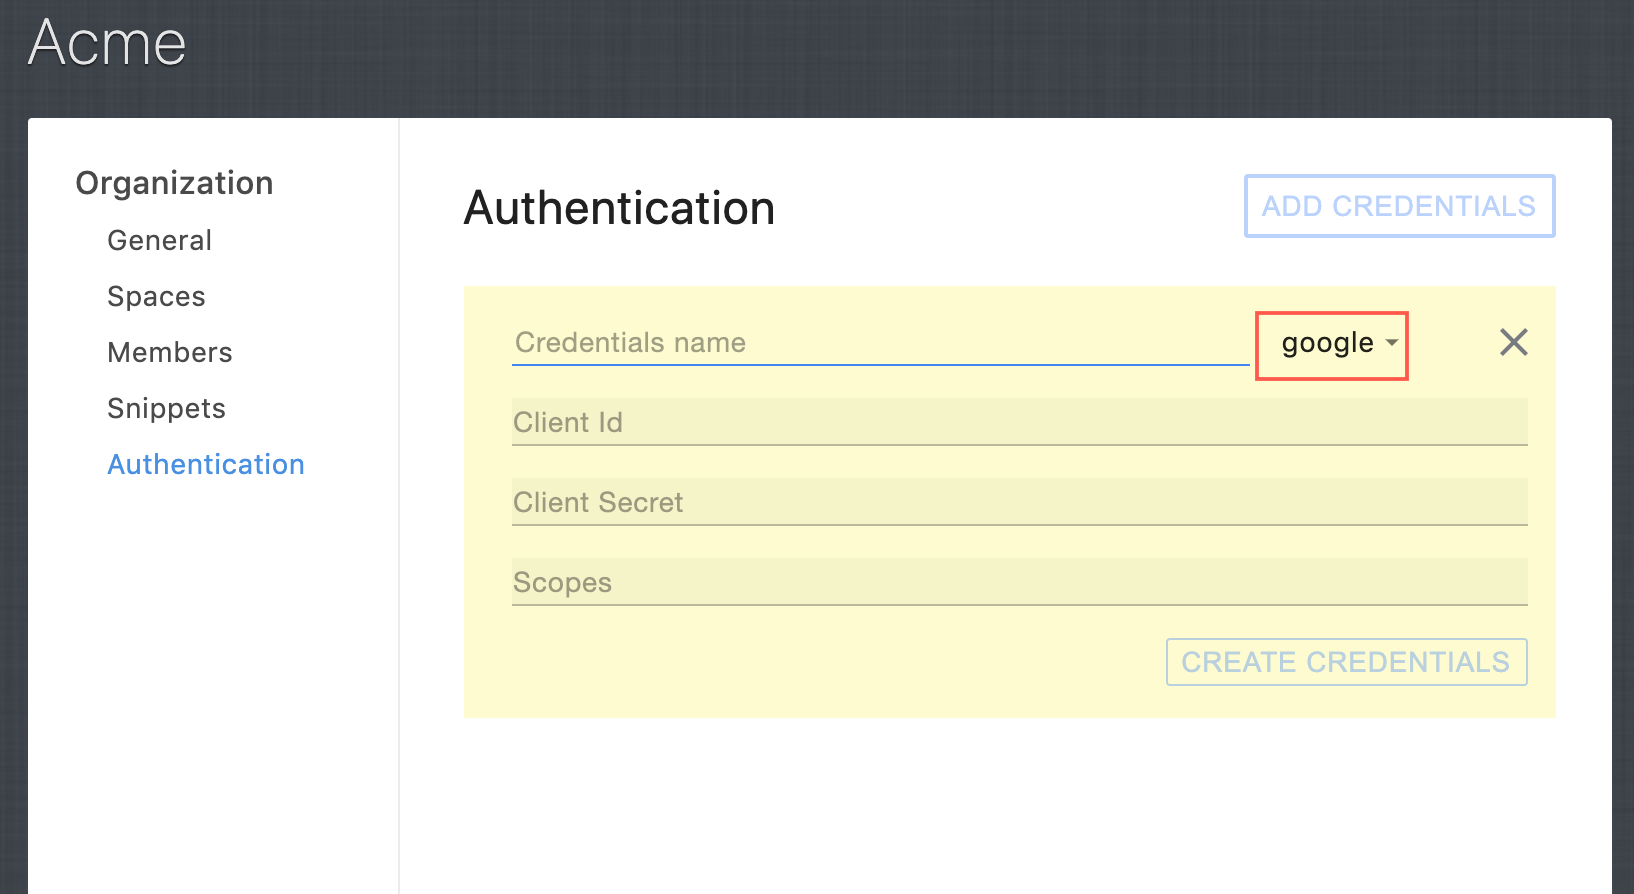
Complete the fields as follows:
- In the Credentials name field, use any unique name. Make sure that google is selected next to this field.
- In the Client Id and Client Secret fields, use the Google Client ID and Client Secret values.
- In the Scopes field, enter the following:email profile openid https://www.googleapis.com/auth/cloud-platform
Click Create Credentials.
Now that you created client credentials in your organization's space, you can use the credentials name (appOAuth2CredentialsName) in the MINTDATA™ third-party authentication functions:
- GET_3RD_PARTY_LOGIN_INFO
- IS_LOGGED_IN_3RD_PARTY
- LOGIN_WITH_3RD_PARTY
- LOGOUT_3RD_PARTY
How to use the client credentials in your application
To authenticate your end-users via Google and get the end-user info:
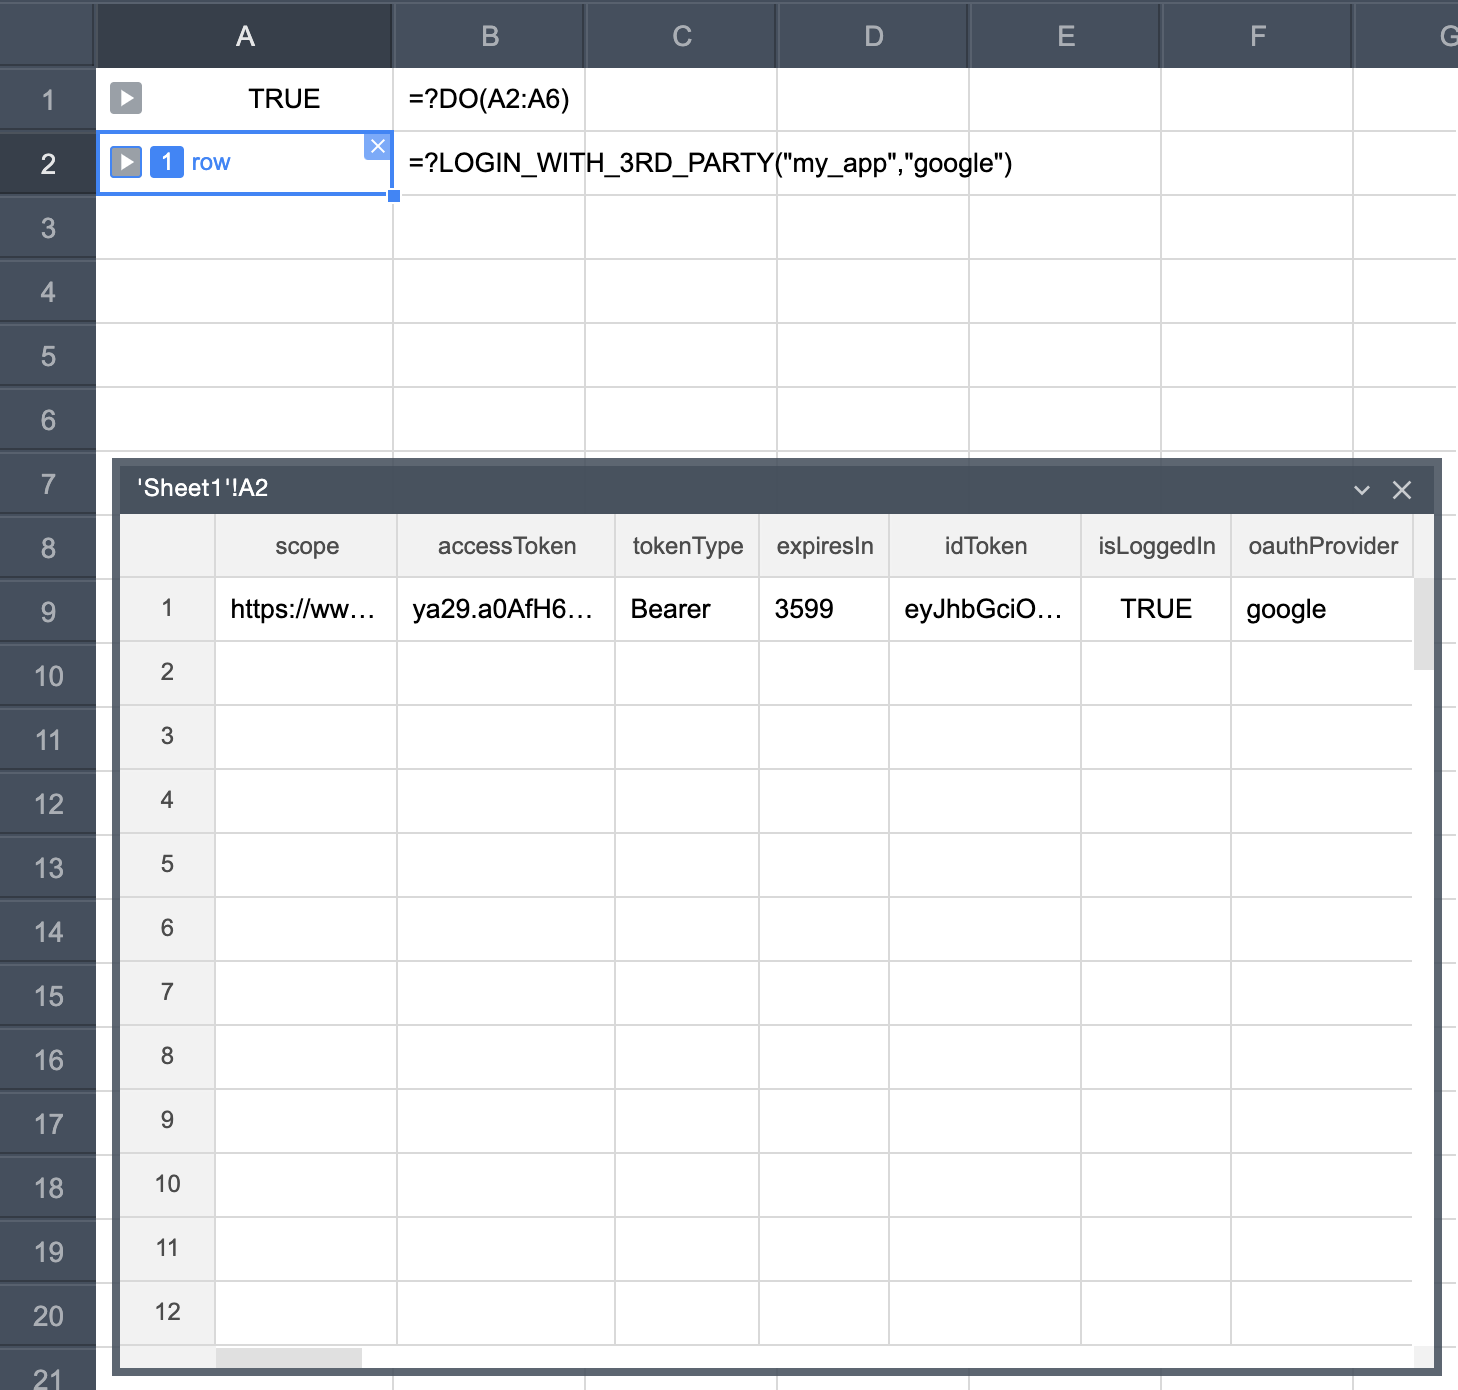
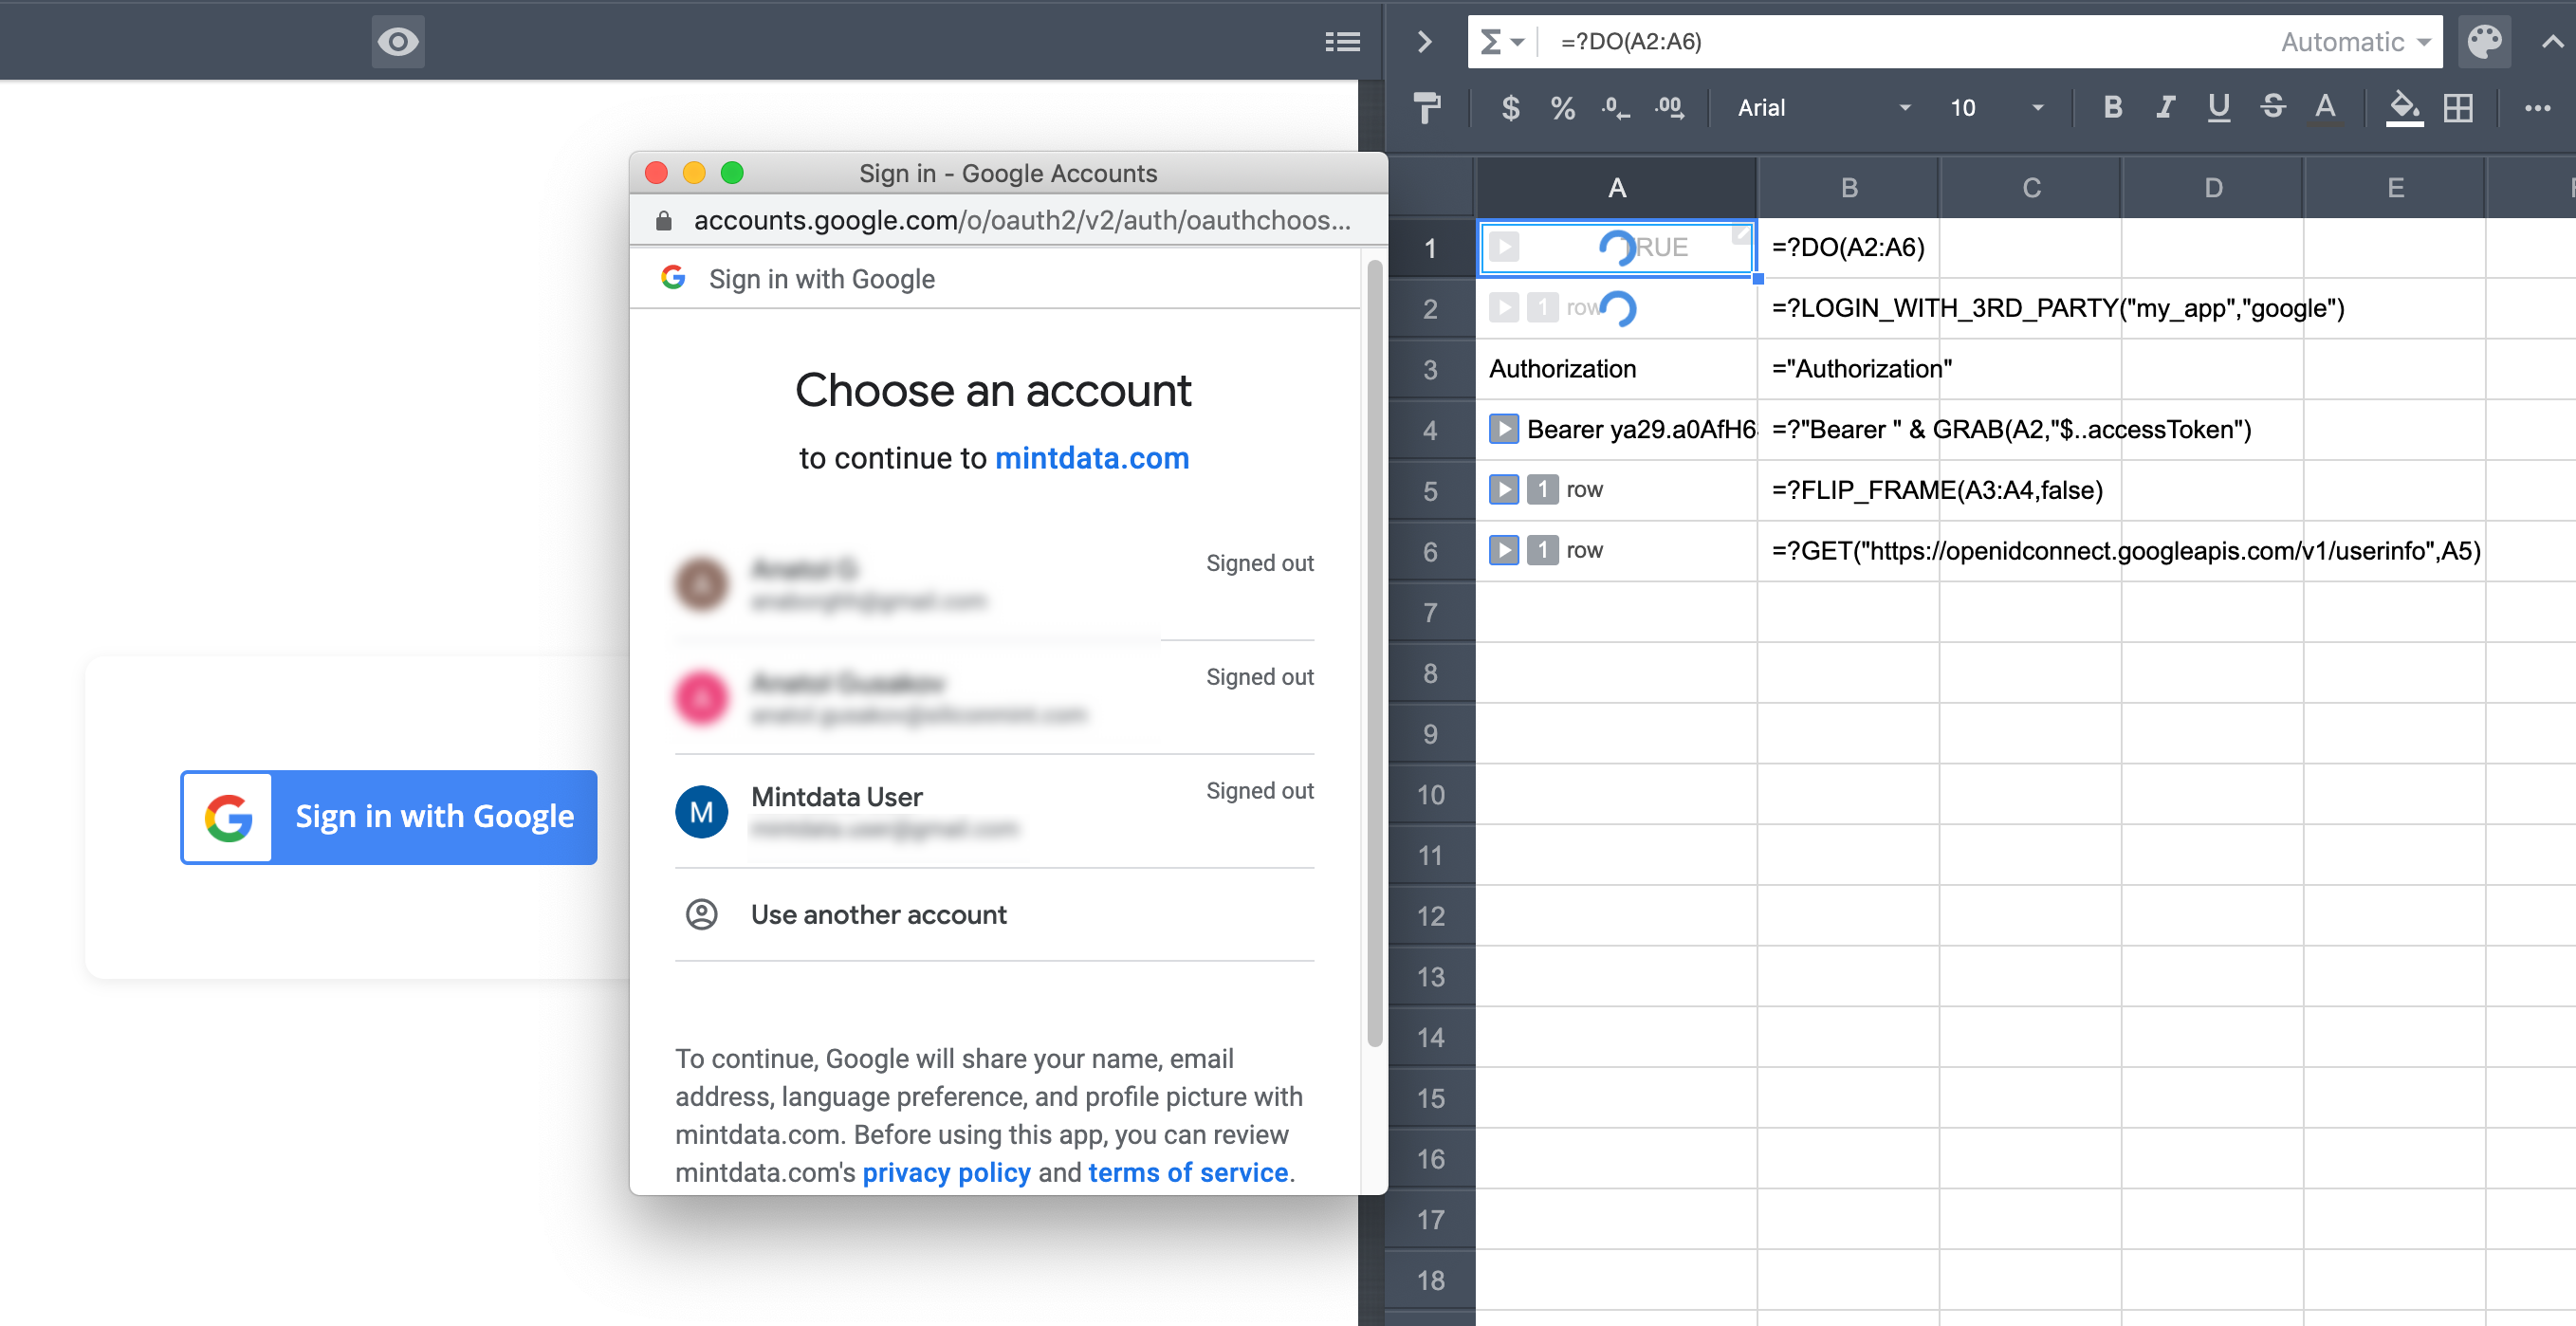
In cell A1, user the DO function to run the functions in the range A2:A6:
=?DO(A2:A6)
In cell A2, pass the credentials name and "google" to the LOGIN_WITH_3RD_PARTY function:
=?LOGIN_WITH_3RD_PARTY(“my_app”,"google")If successful, this formula sends a login request to the Google server, which shows the Google login screen to the end-user and generates an access token, also known as a bearer token.
In cell A3, enter "Authorization":
="Authorization"In cell A4, use this formula to retrieve the bearer token returned in response to our login request:
=?"Bearer " & GRAB(A2,"$..accessToken")In cell A5, use this formula to create a frame containing the Authorization header:
=?FLIP_FRAME(A3:A4,false)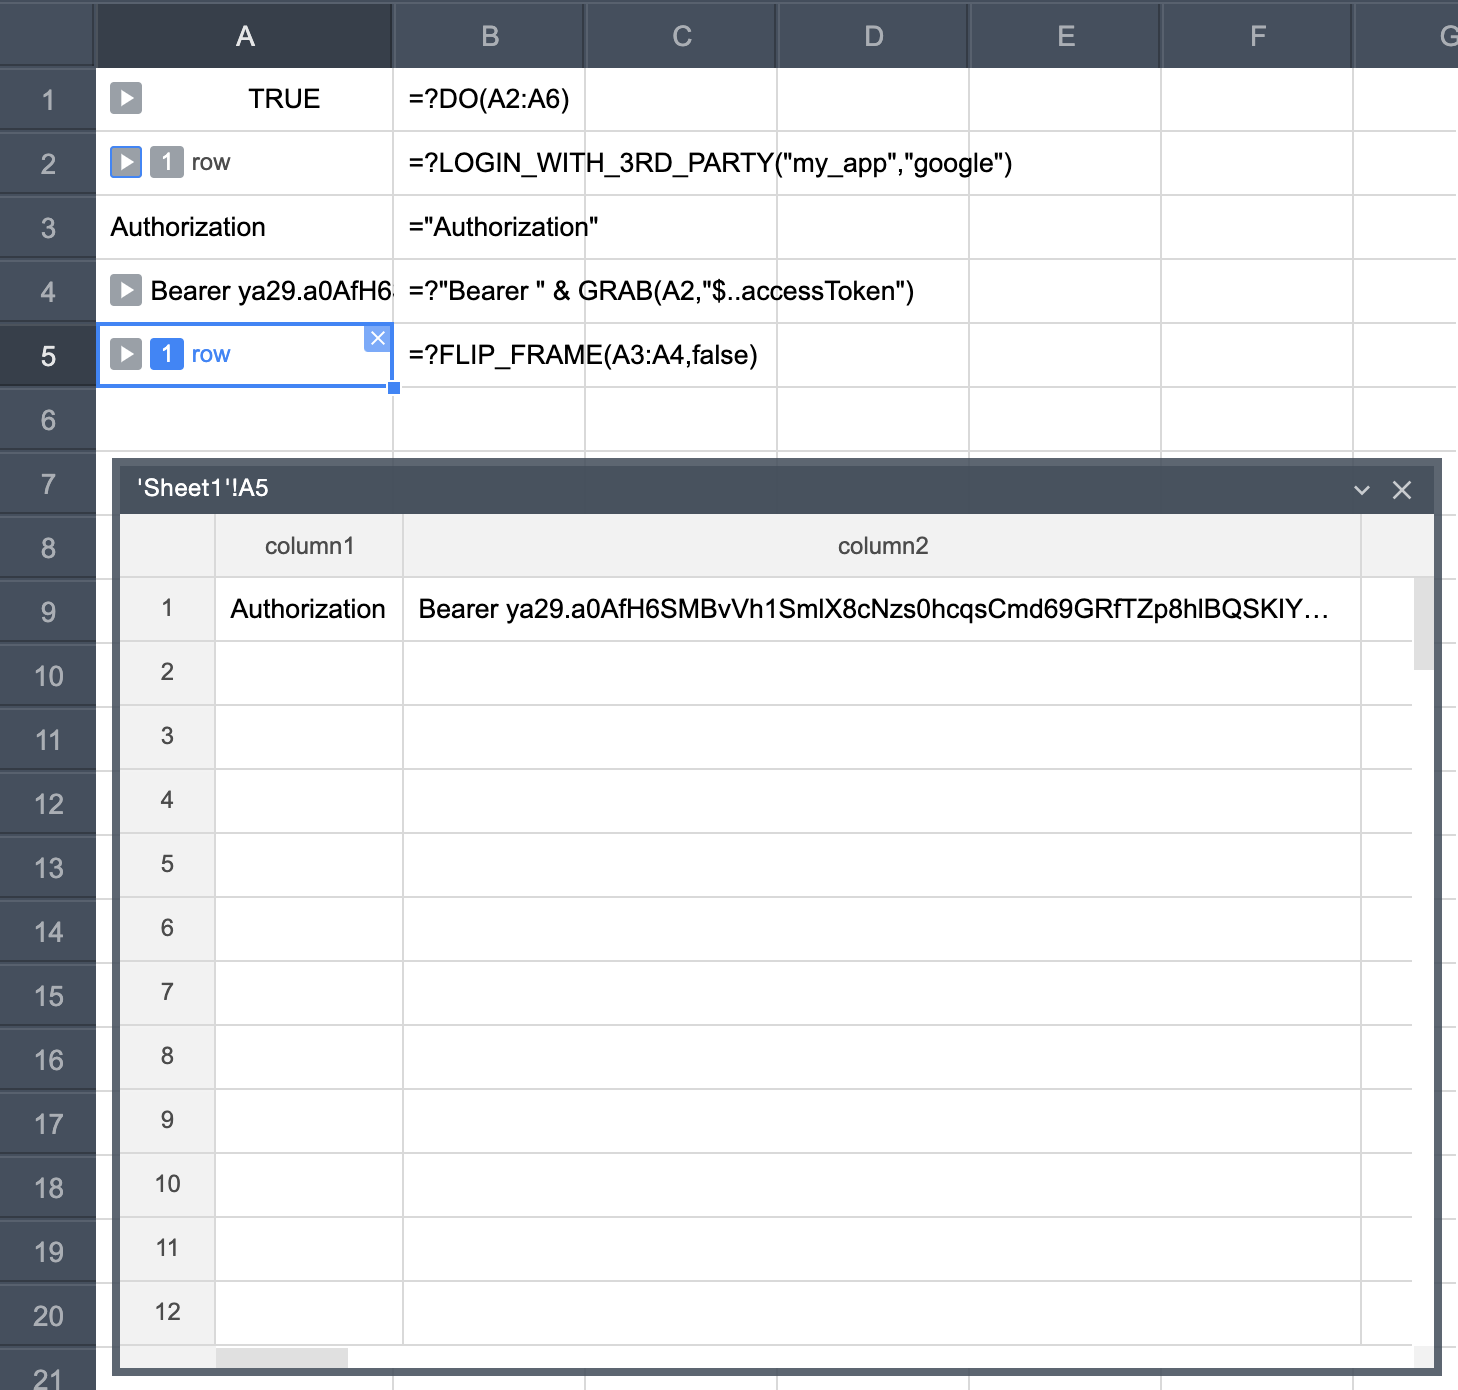
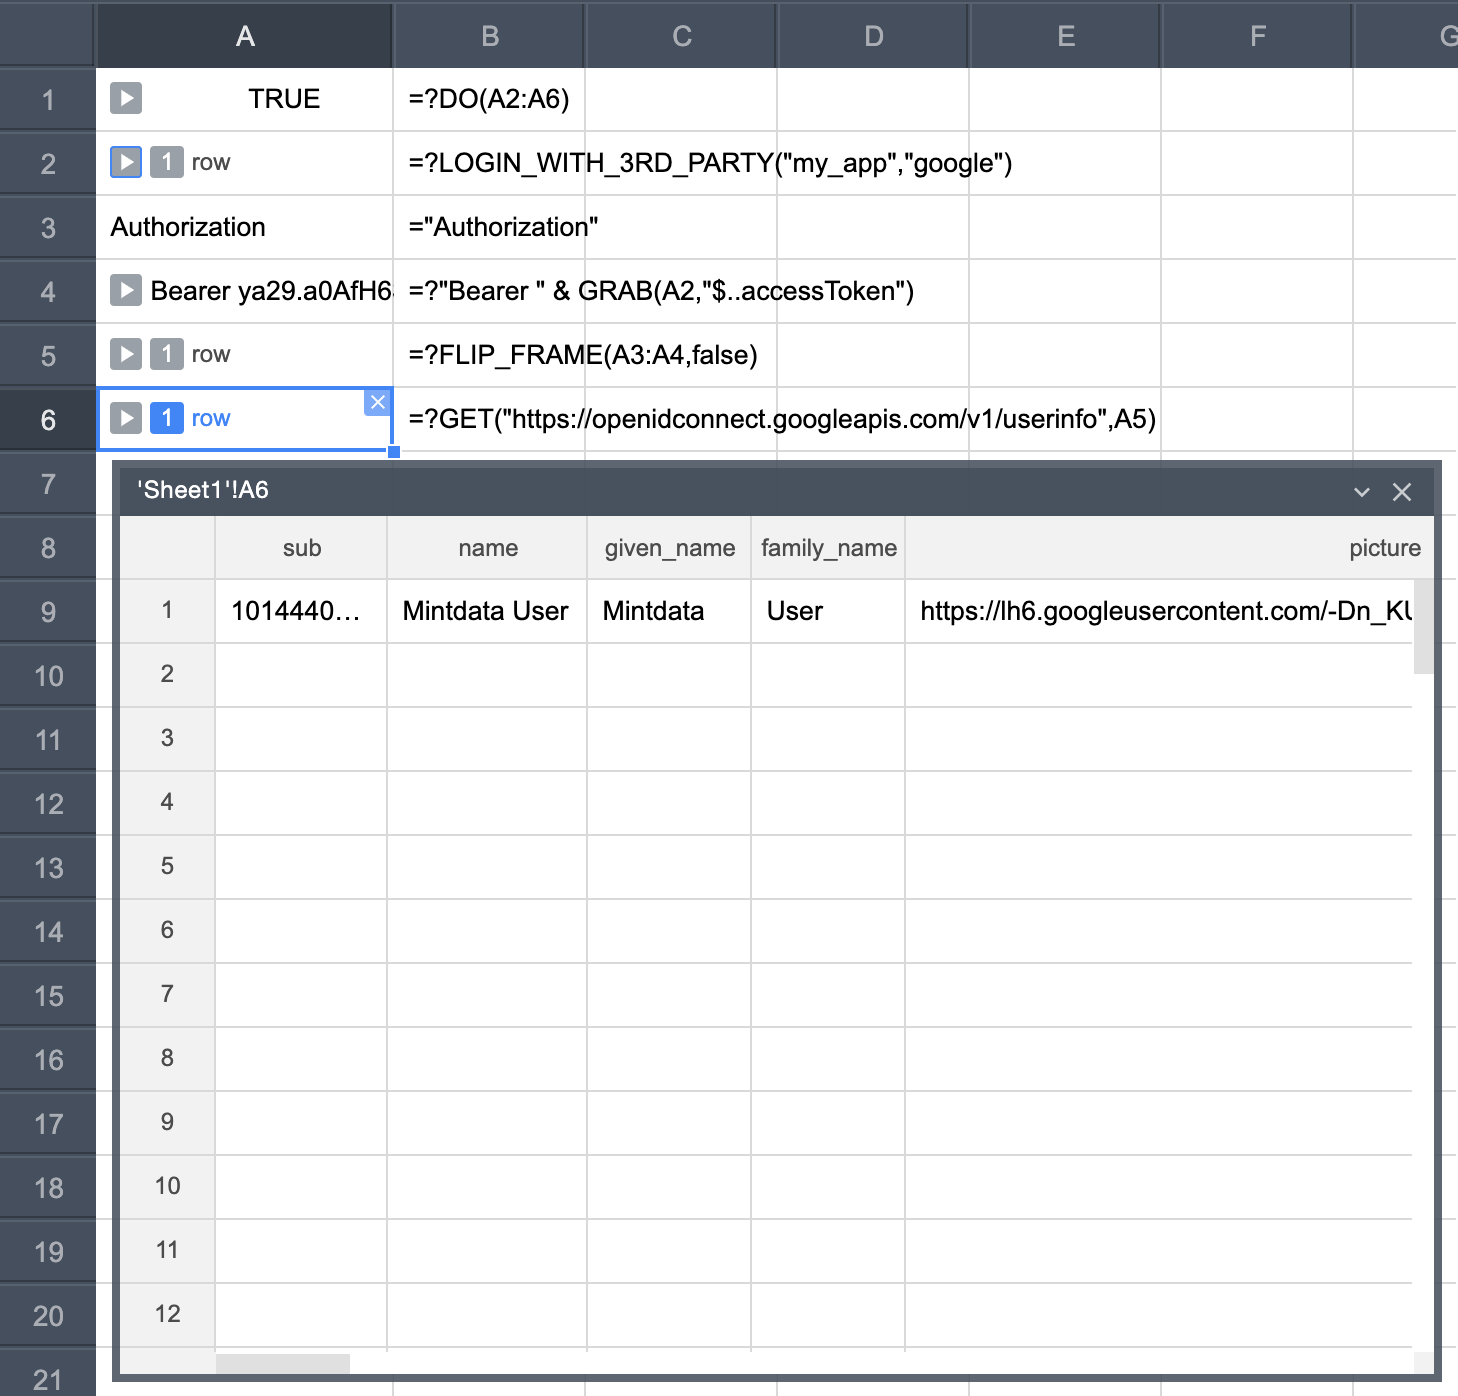
Finally, in cell A6, retrieve the logged user info by sending the Authorization header to the OpenID endpoint:
=?GET("https://openidconnect.googleapis.com/v1/userinfo",A5)The GET function returns a frame that contains the user's name, email, and profile picture:
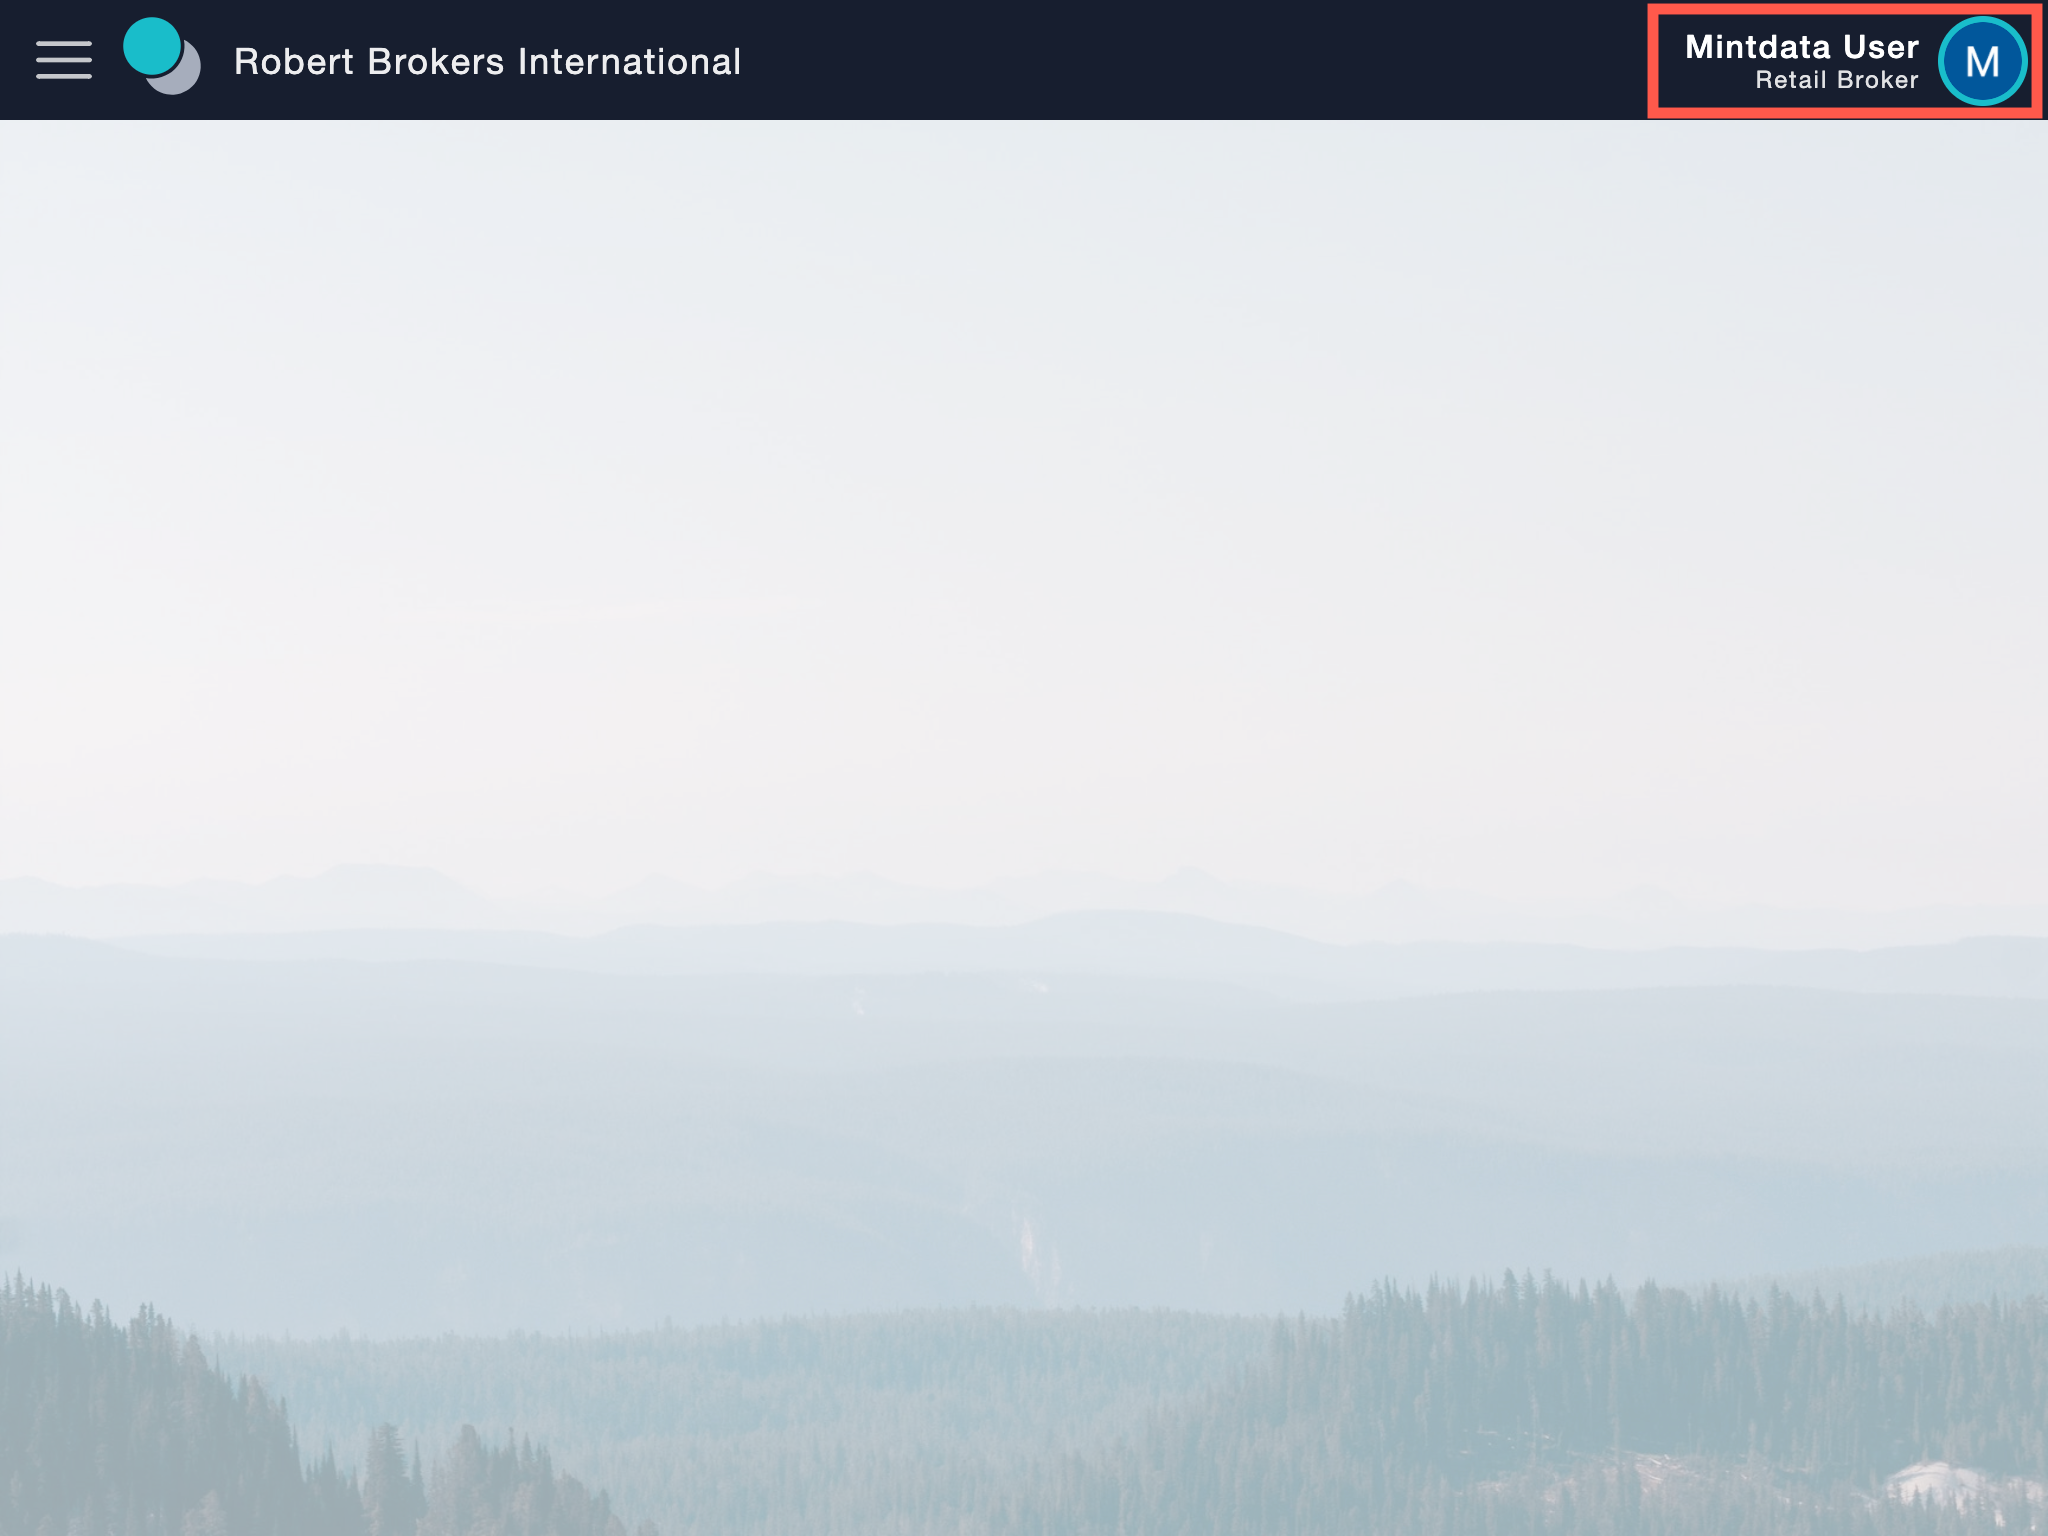
Now that you have the Google login set up, you can draw a nice-looking Sign-in with Google component, and then bind the onClick event to cell A1.
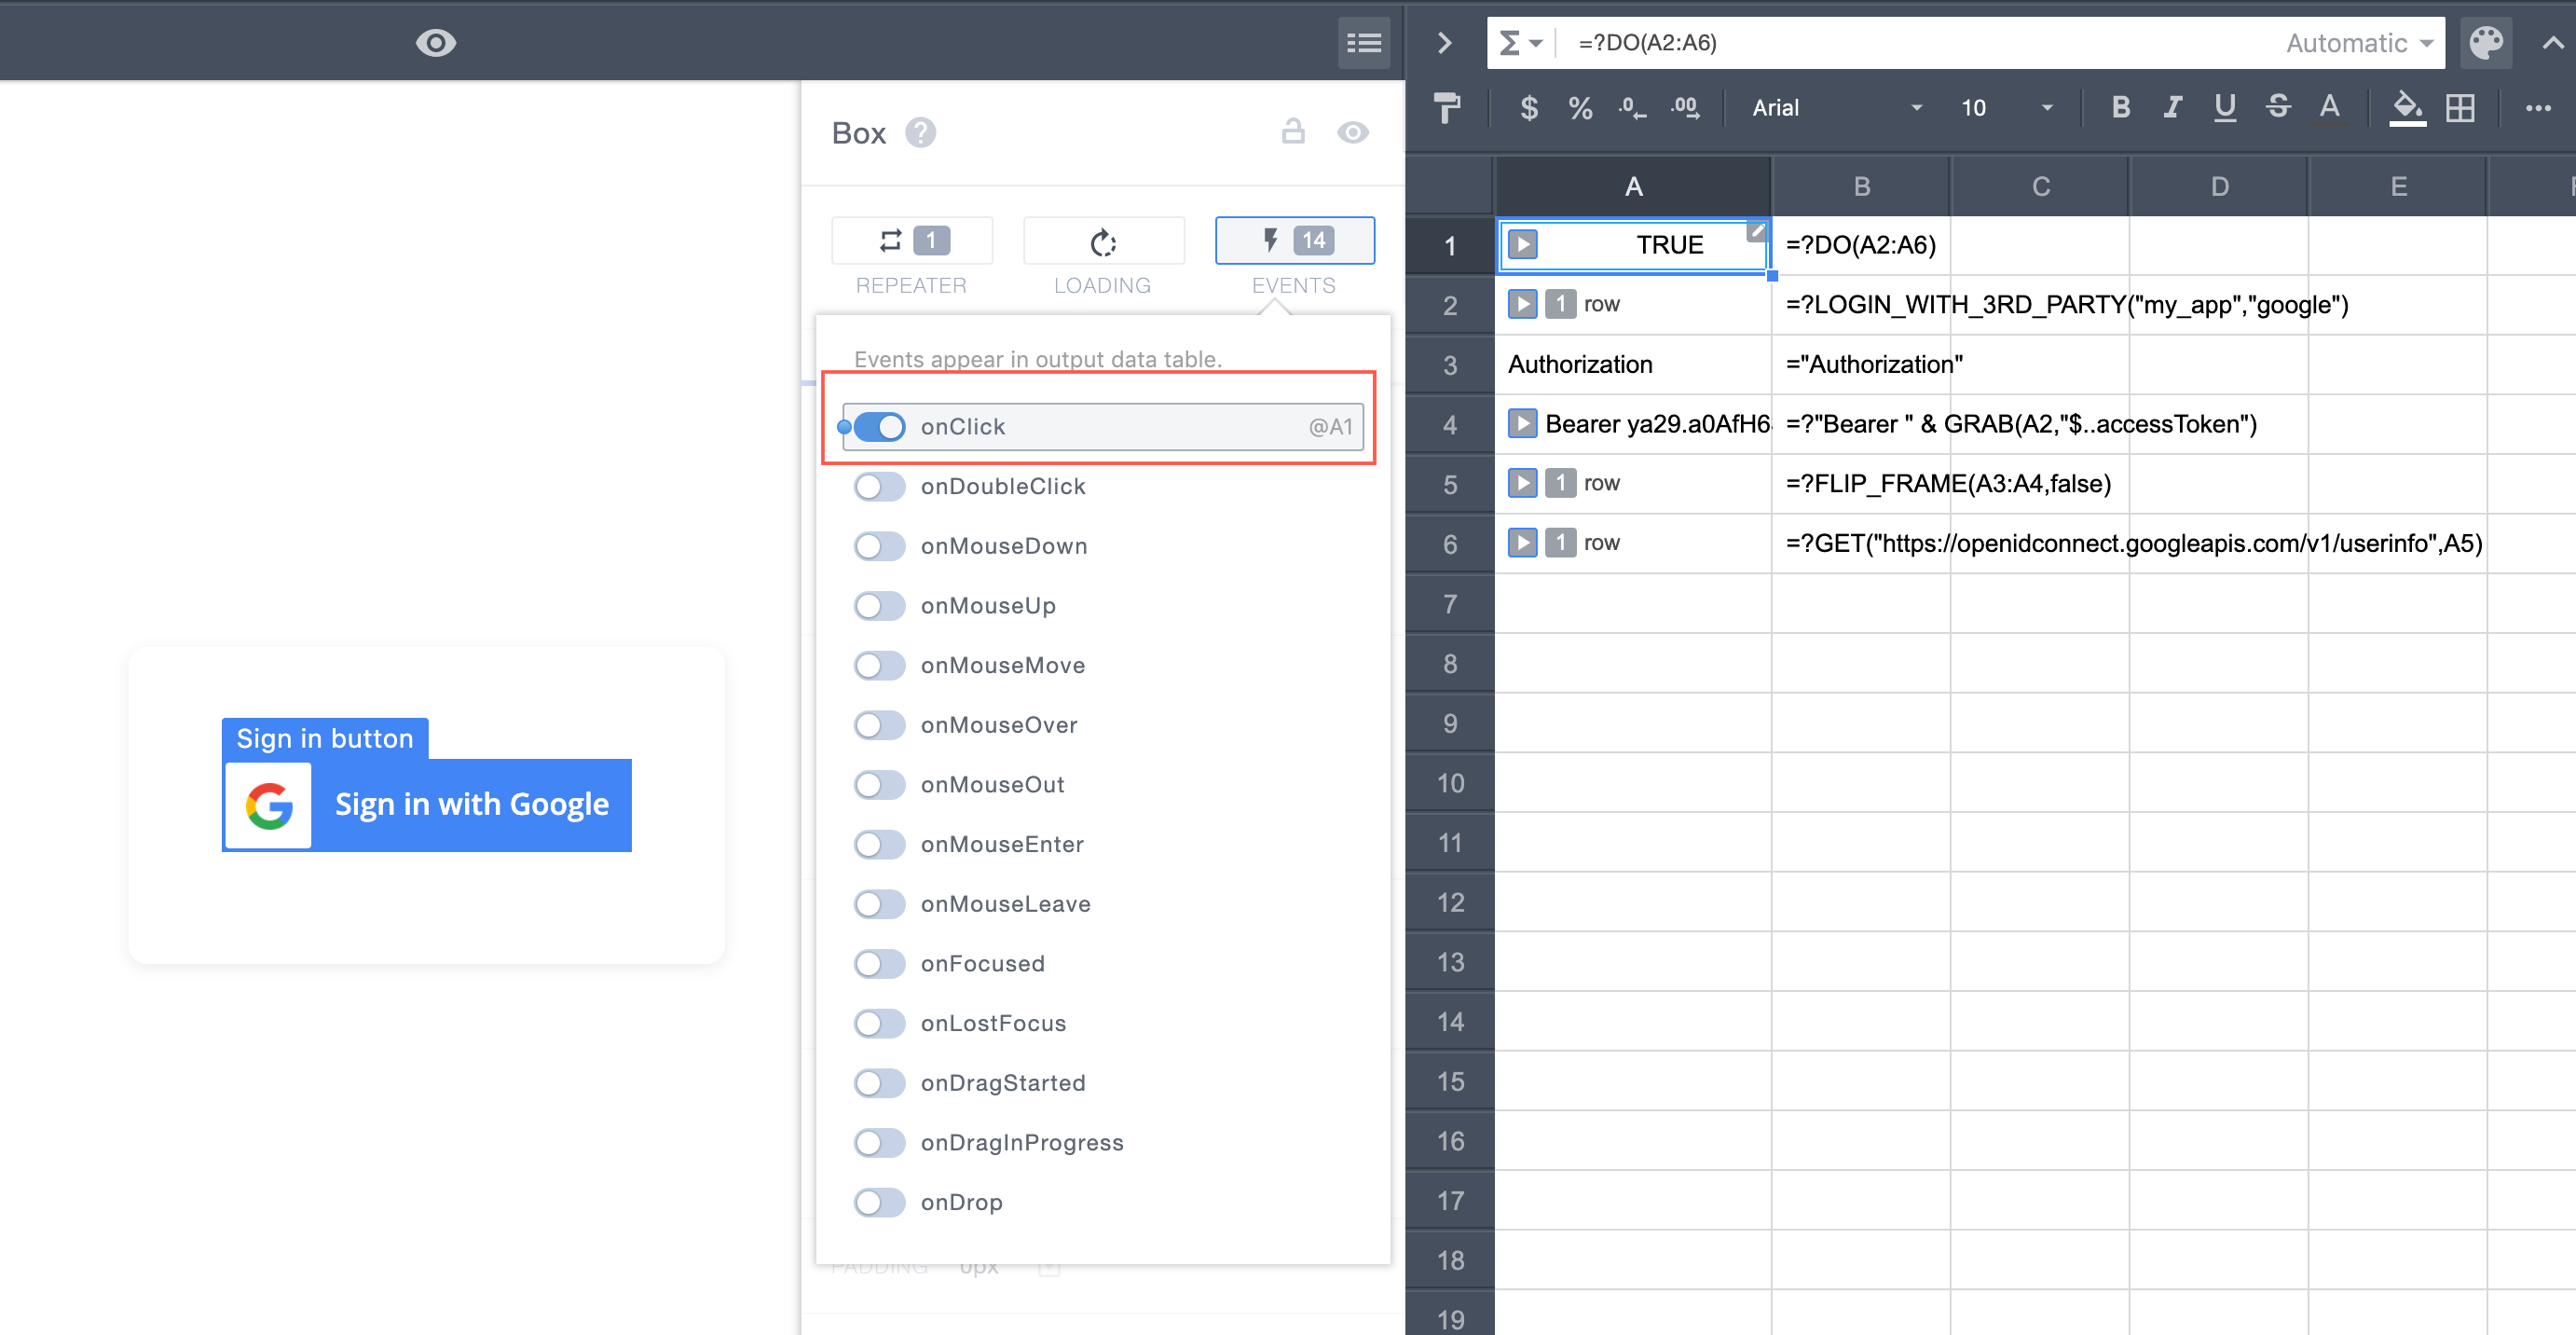
Once we click on Sign-in with Google, the Google login pop-up appears.
Now you can display the user info on the screen: