'/%3E%3Cdefs%3E%3ClinearGradient id='paint0_linear' x1='0' y1='0' x2='0' y2='2160' gradientUnits='userSpaceOnUse'%3E%3Cstop/%3E%3Cstop offset='.1' stop-color='%23000' stop-opacity='0'/%3E%3Cstop offset='1' stop-opacity='0'/%3E%3C/linearGradient%3E%3C/defs%3E%3C/svg%3E%0A)
File picker
The File Picker component is used to upload files.
It is typically grouped with a number of other components in a box.

The following shows an example of how to implement a file-picker in your design.
The procedure consists of these steps:
- Group a File Picker component within a box
- Add and set up an upload button
- Open the files upload dialog on a button click
- Retrieve the file name and location
- Display image files and file names
- Test the application
Group a File Picker component within a box
Add a File Picker component to the page.
Right-click on the component, and then select Group.
From the outline, select the File Picker component, and then click on
 to open the FilePicker properties panel.
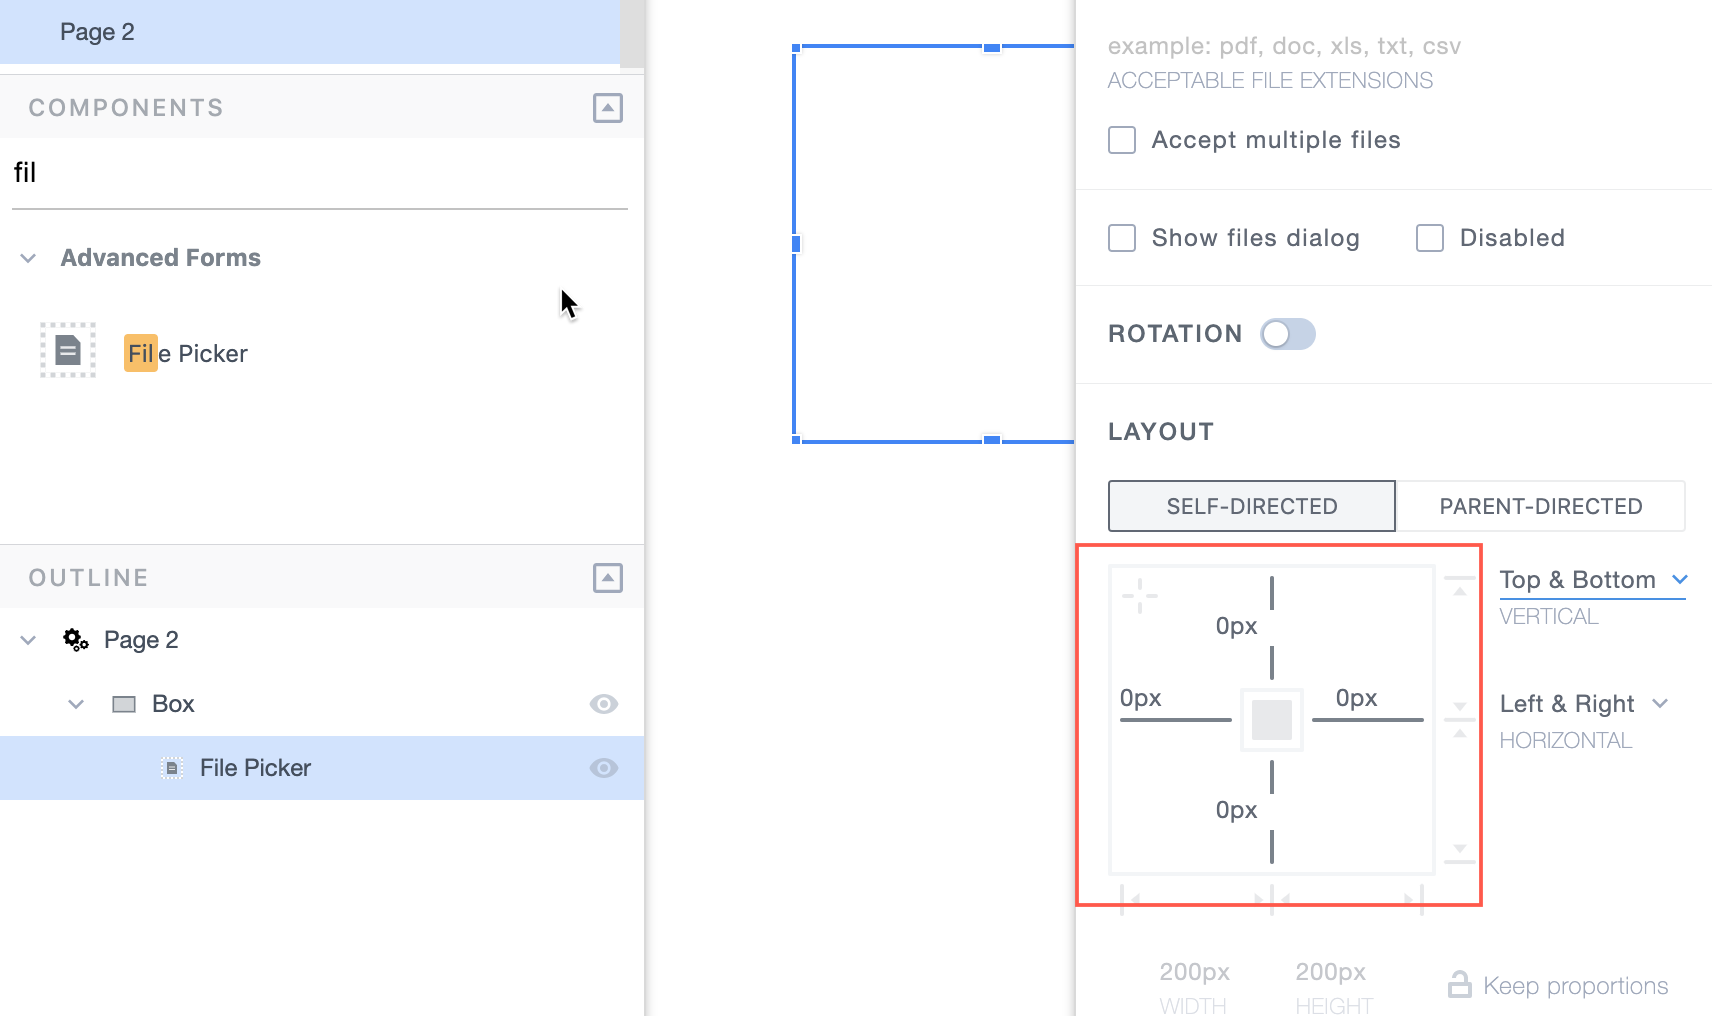
Set up the File Picker layout as follows:
- Select self-directed.
- From the drop-down list above Vertical, select Top & Bottom.
- From the drop-down list above Horizontal, select Left & Right.
- Set the relative position of the file picker edges to 0px as shown in the figure below.
Lock the File Picker component by right-clicking it and selecting Lock.
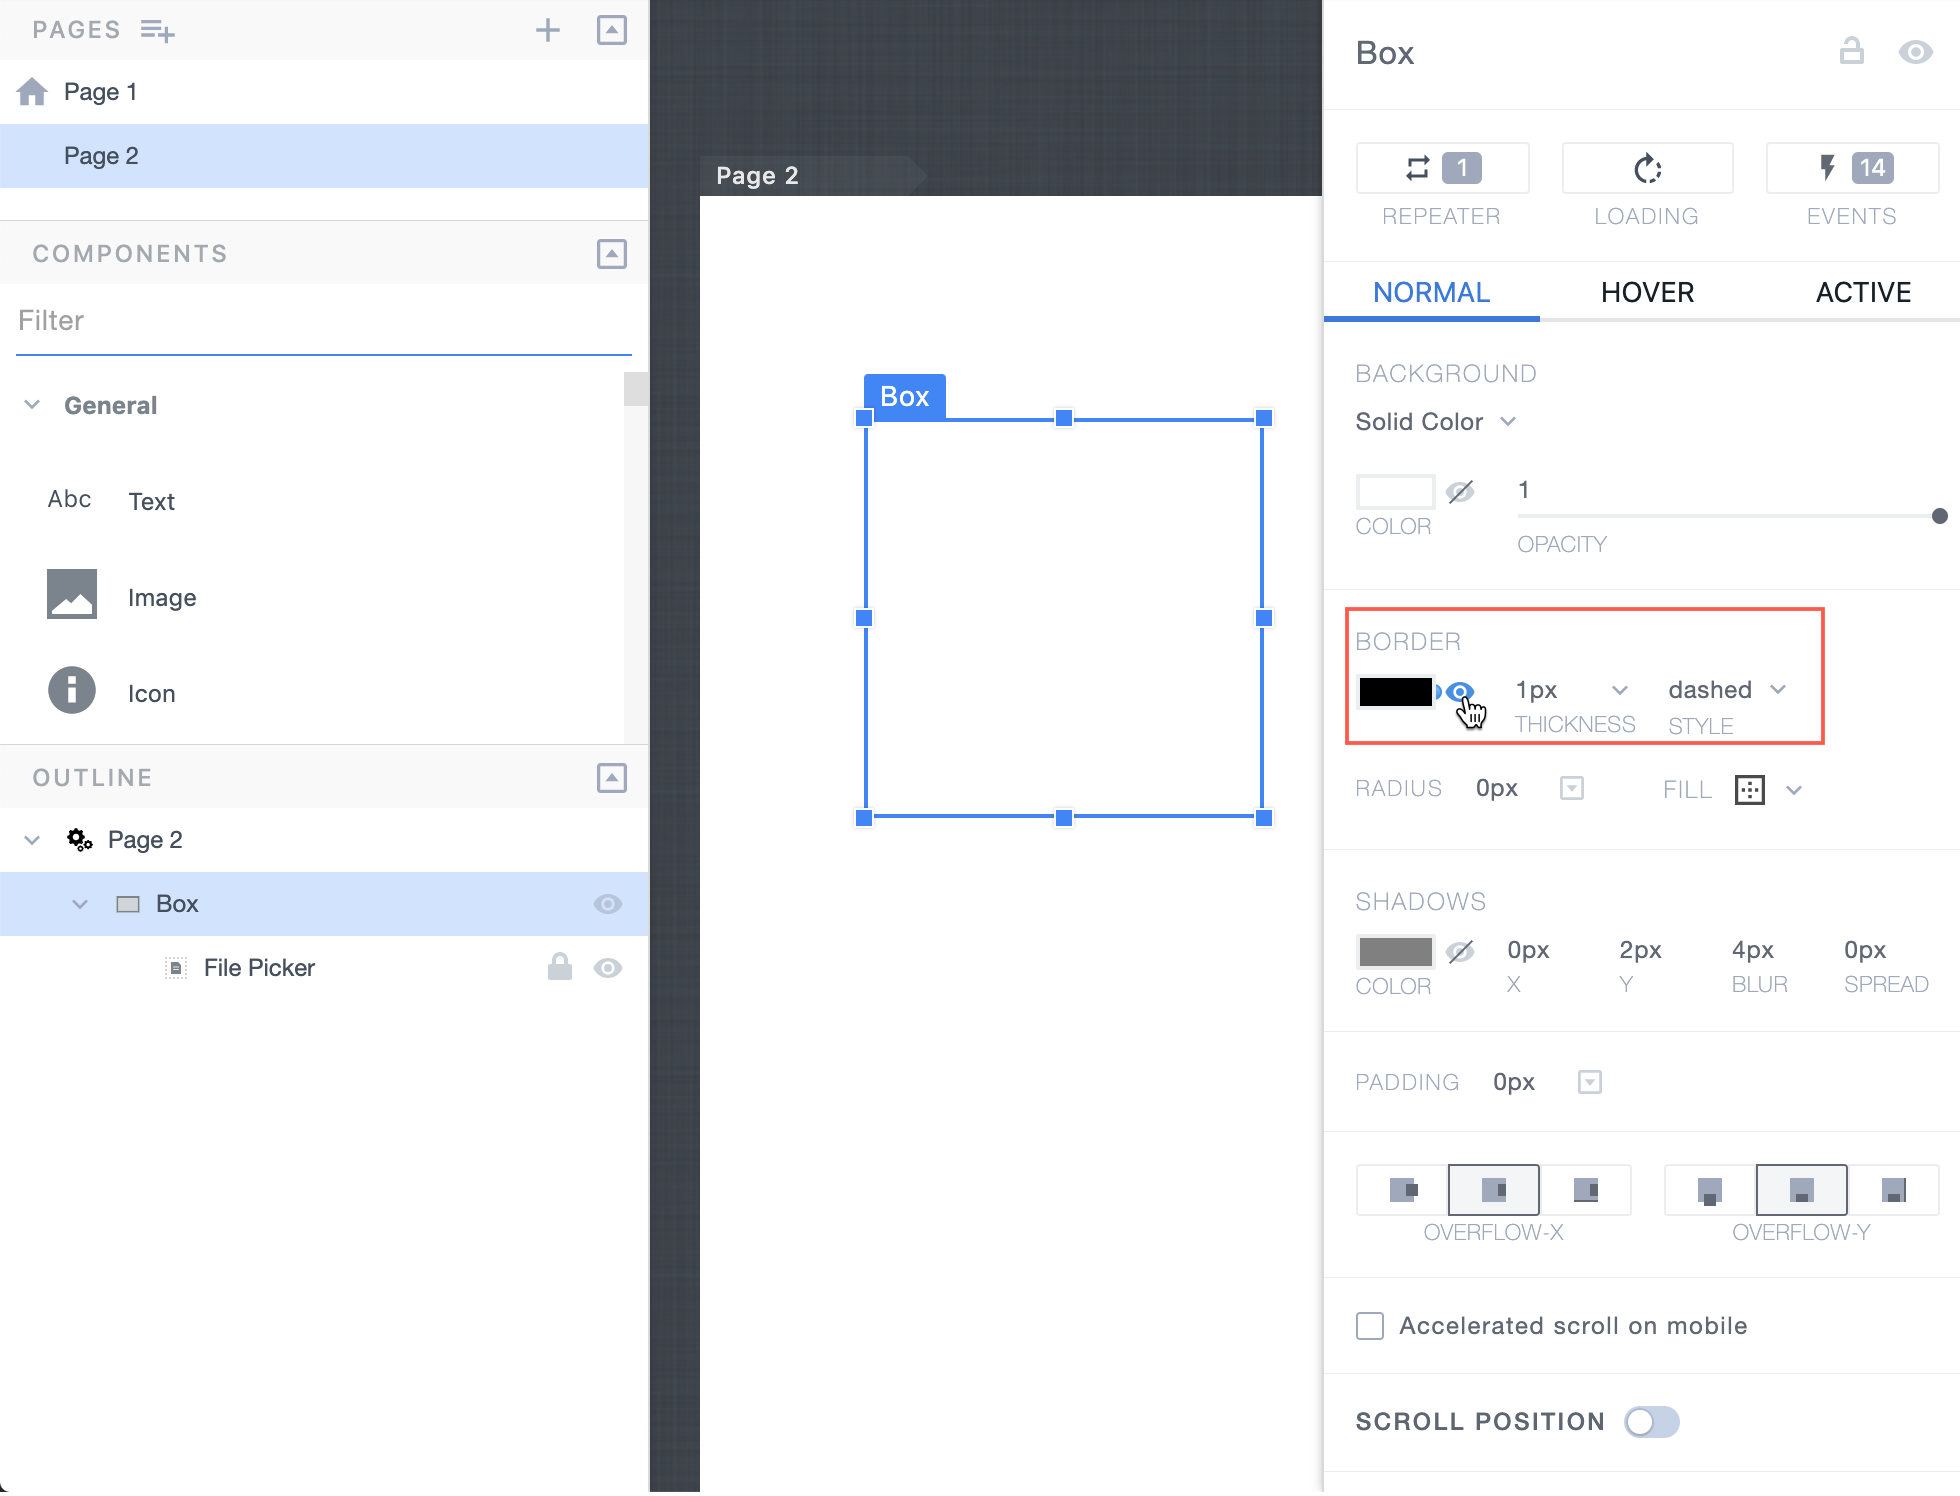
From the outline, select Box.
In the Box properties panel, change the border style to dashed and make the border visible.
Add and set up an upload button
Let's add and set up an upload button:
Add a Button component to the page, to an appropriate place inside the Box component.
In the Button properties panel, change the Caption value to "Upload" or similar.
Add the Button component to the existing group by moving it into Box in the outline.
Open the files upload dialog on a button click
Follow these steps to configure the files-upload dialog to open by clicking on a button:
In the outline, select the File Picker component, and then bind the Show files dialog checkbox to cell A1.
In cell A2, use the below formula:
=SET_CELL_VALUE(A1,true)
Because the function SET_CELL_VALUE() is always lazy, the cell automatically becomes an action cell. When the cell evaluation is triggered, the function sets the value of cell A1 to True, upon which the files-upload dialog opens.
In the Button properties panel, click on the Events button
 and bind the onClick event to cell A2.
Retrieve the file name and location
Follow these steps to display an image file and the file name on upload:
In cell A3, use the lazy E() function to return the OnFilesReady event as a frame.
=E()Bind the File Picker component's OnFileReady event to cell A3.
In cell B4, use the GRAB() function to retrieve the name of the file from the frame returned on a file-ready event.
=GRAB(A3, "$..accepted_files..name")In cell B5, use the GRAB() function to retrieve the location of the file from the frame returned on a file-ready event.
=GRAB(A3, "$..accepted_files..data")
Display image files and file names
Add an Image component to the page, and then, in the outline, move the component into Box.
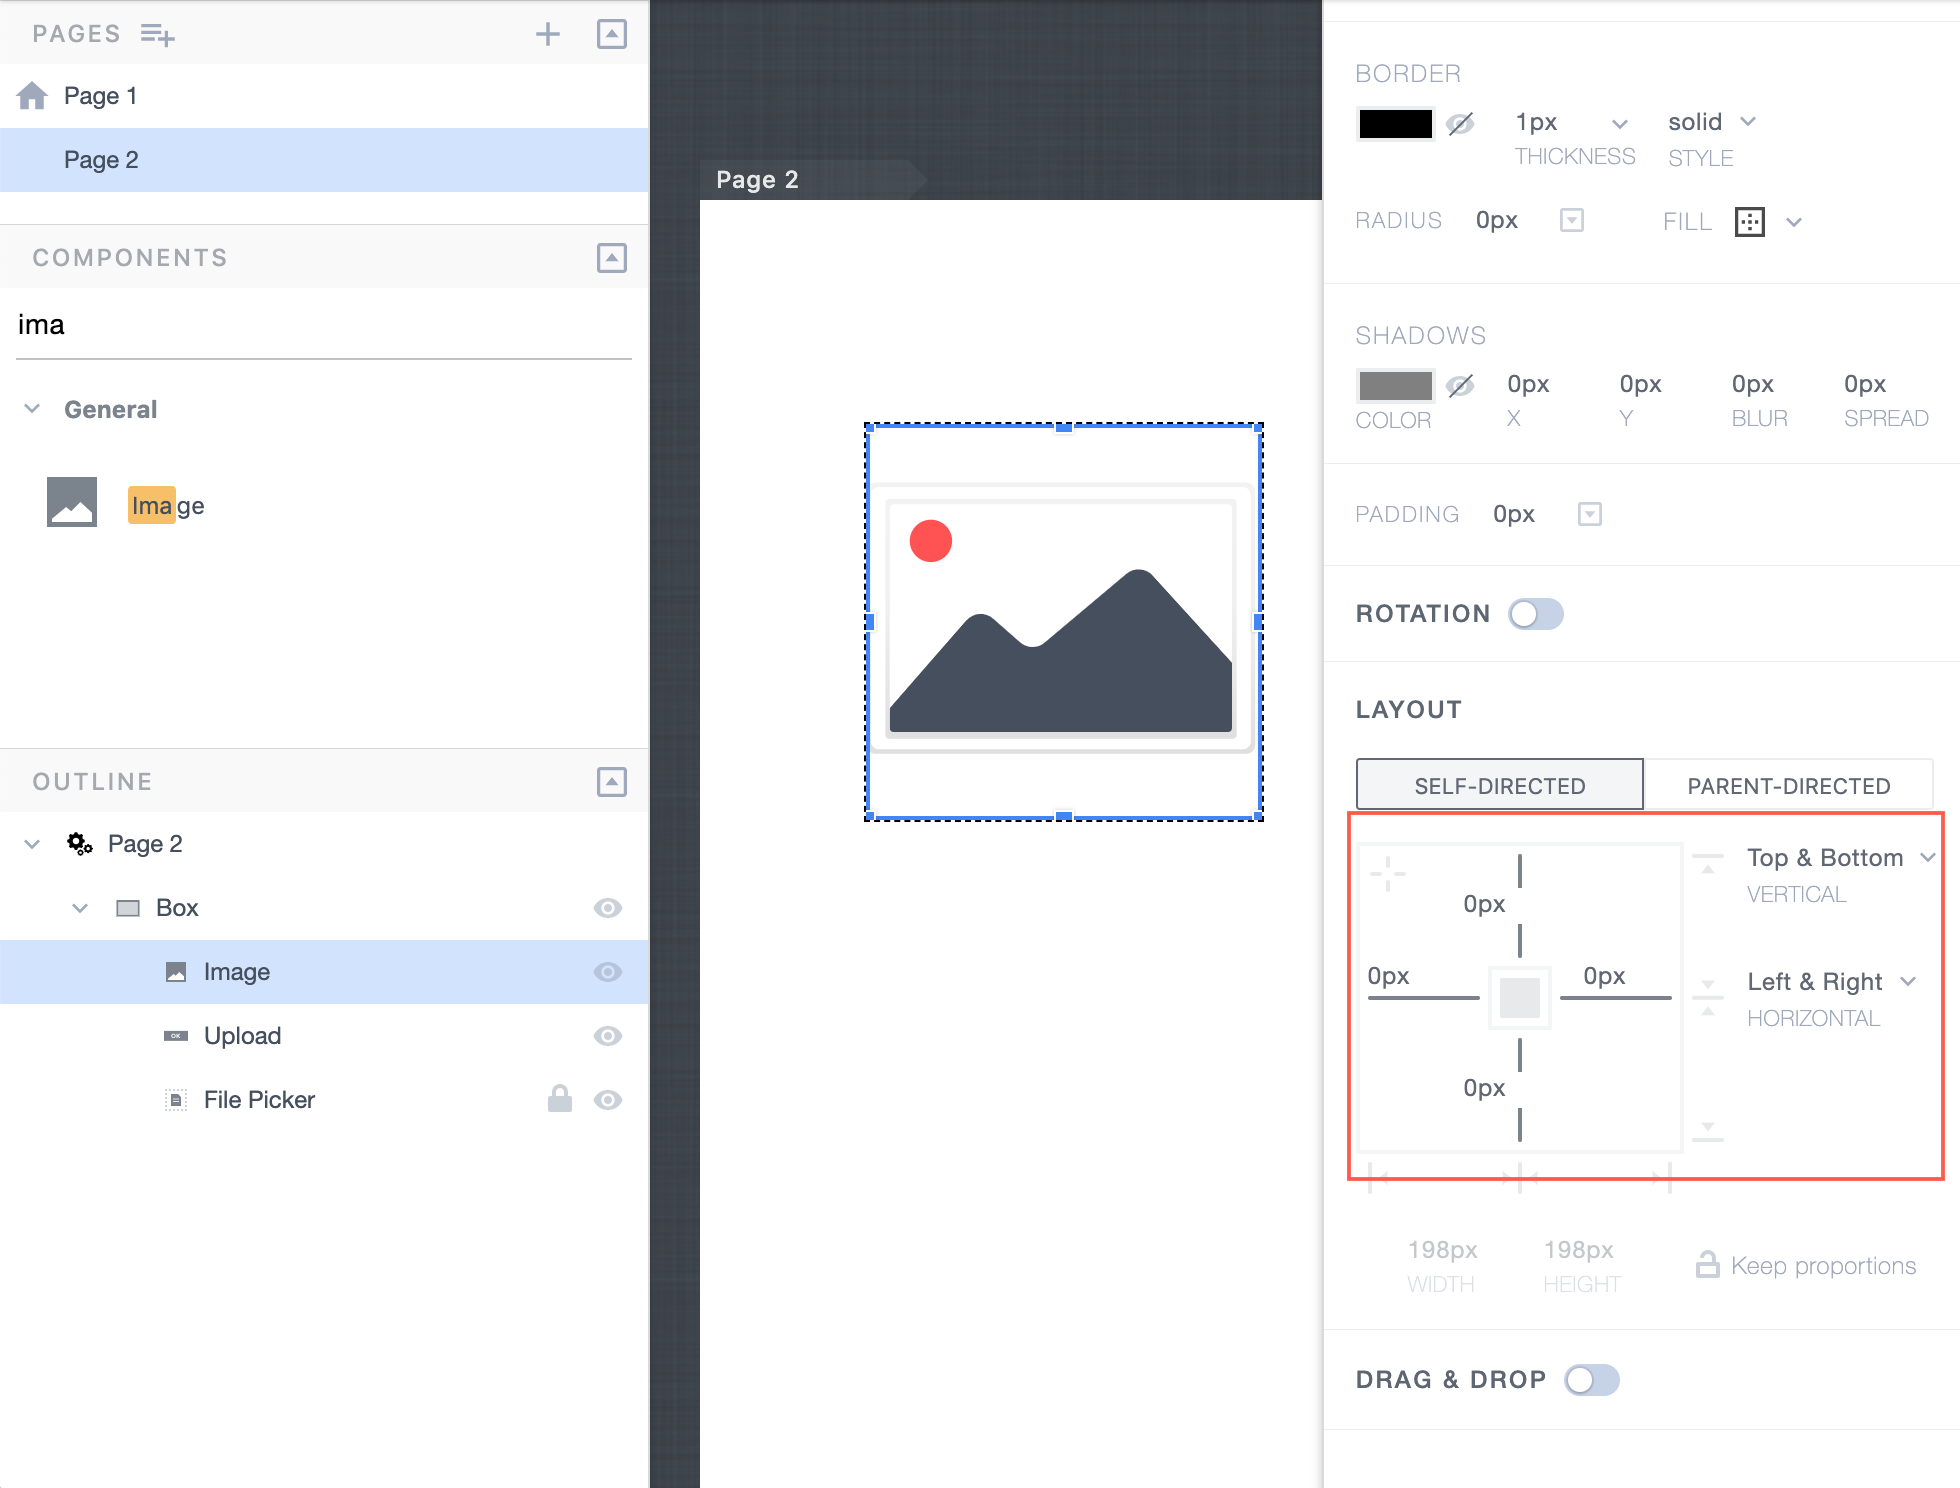
Set up the Image component's layout as follows:
- Select self-directed.
- From the drop-down list above Vertical, select Top & Bottom.
- From the drop-down list above Horizontal, select Left & Right.
- Set the relative position of the image edges to 0px, as shown in the figure below.
Right-click the Image component, and then select Order > Send to back to send the image behind all the components in the group.
Lock the Image component by right-clicking it and selecting Lock.
Select the Image component and bind its URL property value to cell B5.
Add a Text component to the page and move it to any place within the borders of the box.
If needed, adjust the Text component size.
Select the Text component, and then, in the Text properties panel, delete the default Text property value.
Add the Text component to the component group by moving it into Box in the outline.
Select the Text component and bind its Text value to cell B4.
Select the File Picker component, and then, in the FilePicker properties panel, under Upload Behavior, select Upload files to cloud. The cloud storage https://files.mintdata.com is used for this option.
Test the application
Click Preview.
Try uploading an image file by clicking the upload button and by dragging an image file to the component group area. After the file is uploaded, make sure the file name is displayed, and the image is displayed in the background.